Locker Pairing can be used on Touch systems working in the Fixed Return to Single System (FRSS) mode. It can be setup to function with locker systems as RFID and or non-RFID. This will allow a user to take one or more primary items from separate compartments and automatically be given an item from a secondary compartment. The reverse of this process however is not the case.
An example of its application could be a supermarket that may have one or more barcode scanners held in multiple compartments and the batteries for the scanners held in another.
NOTE: At Traka We recommend that the standard use case for the secondary compartment be non-RFID and the primaries be RFID, although TrakaWEB does allow combinations of either.
NOTE: If the “Allow any user to return items” option has been enabled with Locker Pairing, it is critical that during handover between users that both paired items are handed over and that the user returning the items has access to both paired locker compartments.
Should you require a change to your chosen configuration, please contact Traka or your Distributor.
Due to the nature of the Item Pairing feature, it is incompatible with the following features on TrakaWEB/Traka Touch:
Temporary Key Store (TKS)
DockSafe
Rack Manager
To enable Locker Pairing on TrakaWEB, at least one of the systems connected to TrakaWEB must be configured to work with the Pairing function enabled. To enable Locker Pairing for a specific system, you will need to upload an appropriate Config file onto that system.
To obtain the relevant Config files with the Pairing option enabled for your systems, contact Traka or your Distributor.
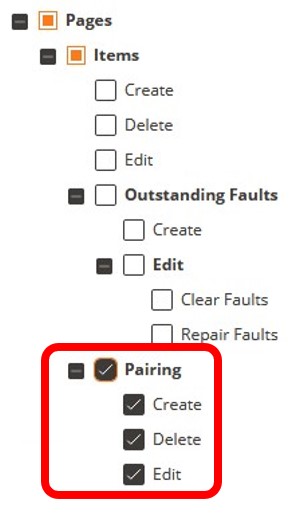
As a TrakaWEB administrator, you may or may not have the necessary permissions to create, edit, or delete Locker Pairing rules. To check if your Software Permissions Group has got appropriate permissions, make sure that the following checkboxes relating to the Locker Pairing are ticked in the Edit options of your Software Permissions Group. The Locker Pairing permissions can be found in the software permissions tree under Web > Pages > Items > Pairing:
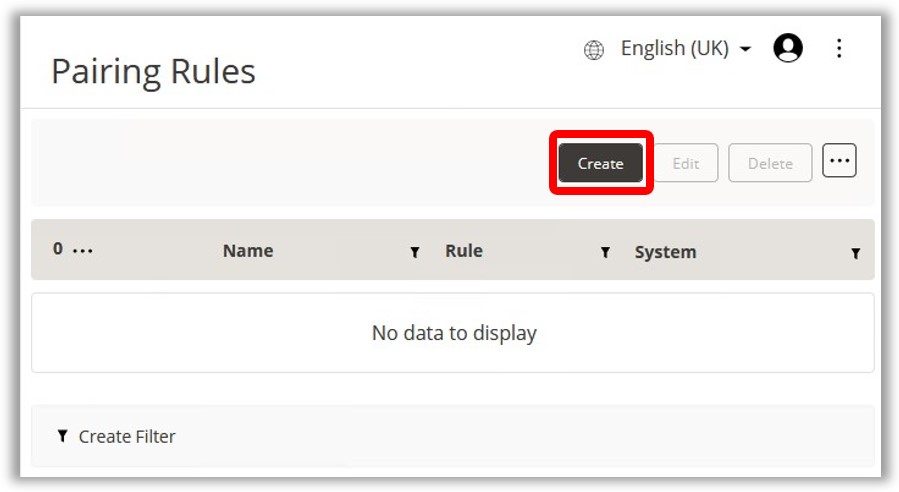
You will be taken to
a new page, where you will need to provide a name for the new rule,
and then subsequently select the Region and the System which will
be affected by the new rule, as well as select the Pairing Rule that
you need to create.
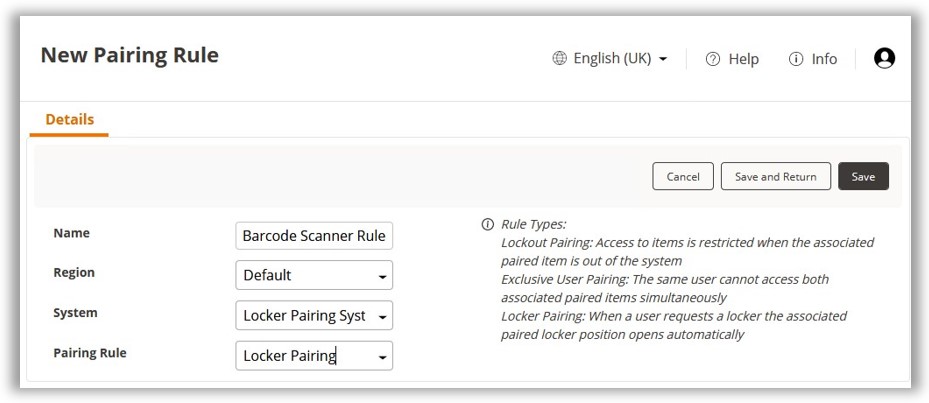
The only pairing rule available is Locker Pairing which will automatically
be selected when you click on the Pairing Rule.
Once you have made your selection, click on Save.
NOTE:
Once you have created the rule, you will not be able to change
its selected Region, System, or Pairing Rule Type. If that is the
case, you will need to delete the rule and create a new one instead.
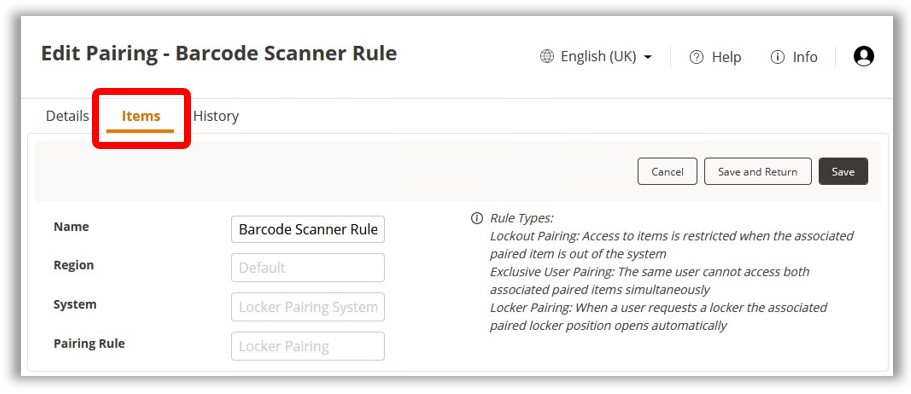
The page will now update, and your selected Region, System, and Pairing
Rule Type will be greyed out. You will also gain access to two new
tabs: Items and History.
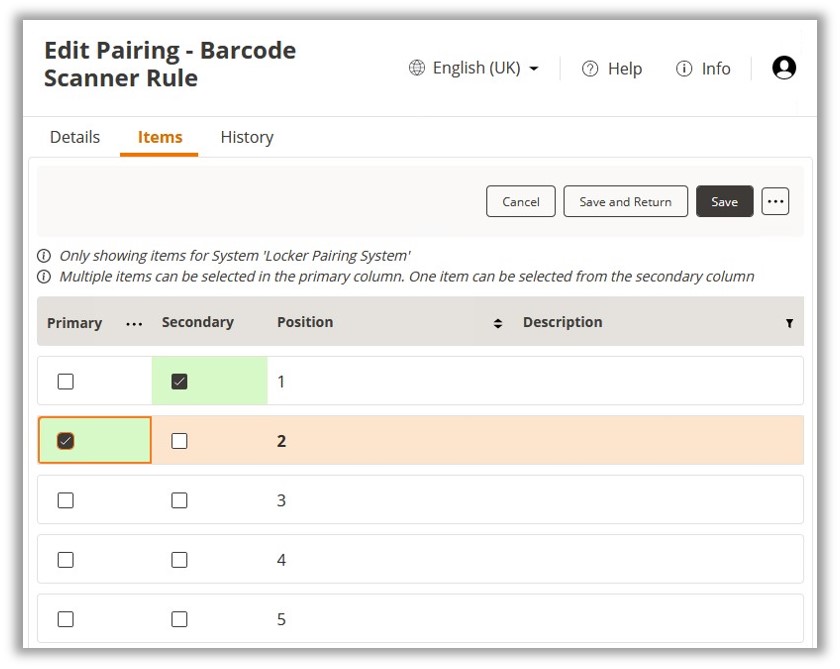
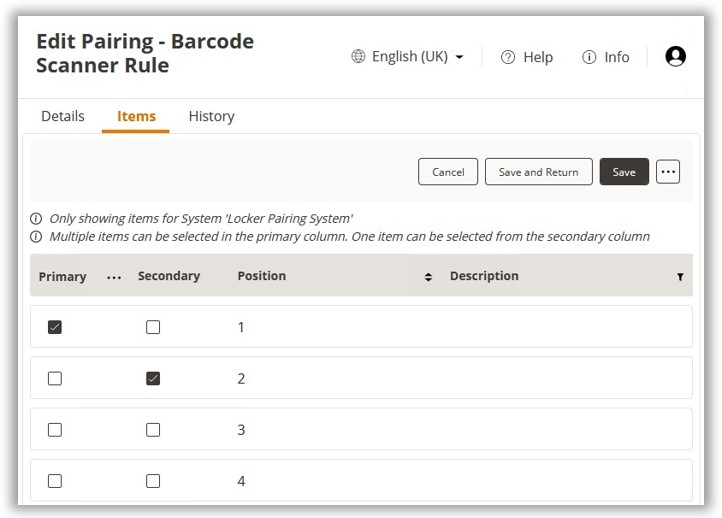
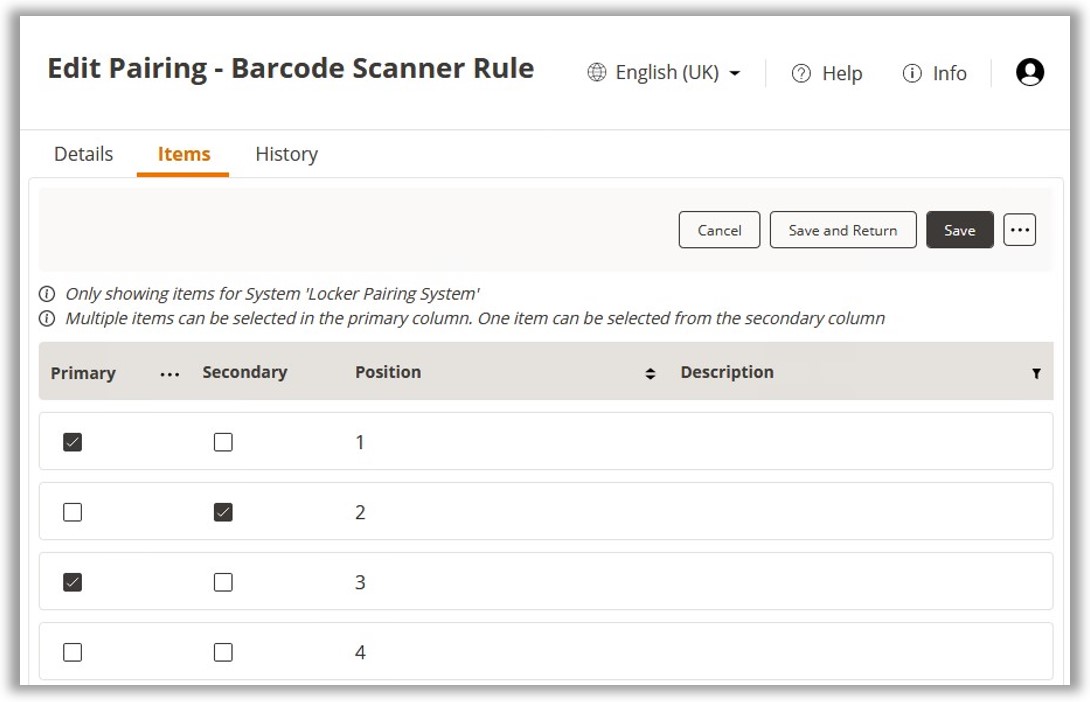
Select the Items tab.
Select your Primary
and Secondary Items by checking the boxes in the relevant columns
next to the respective Items’ positions.
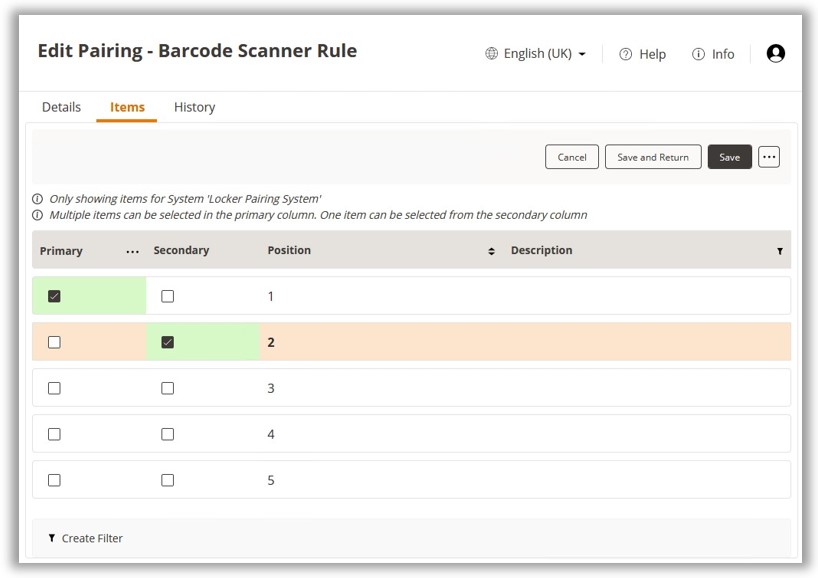
NOTE: With
Locker Pairing, you may select only one Secondary item, but you may
select multiple Primary items as required.
Once you have chosen your Items for the Locker Pairing Rule,
click on Save and Return.
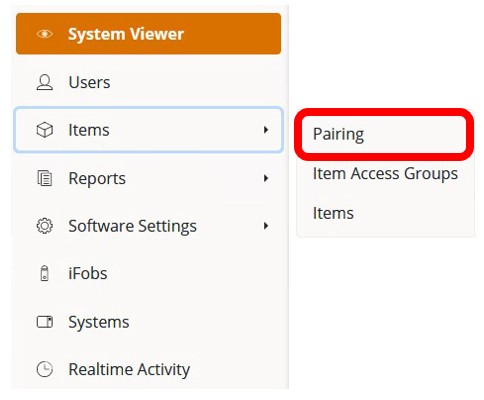
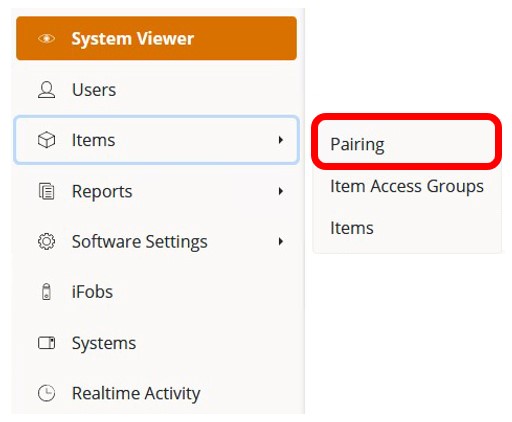
To edit a Locker Pairing
rule, select Items on the Navigation Menu. The menu will expand
and display the Pairing option.
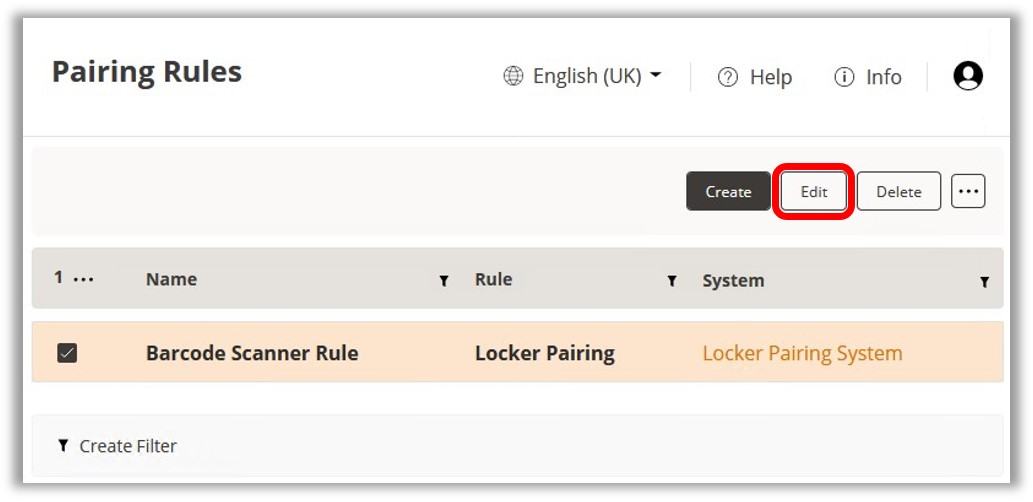
TrakaWEB will then display
all the current Locker Pairing rules that exist within the database.
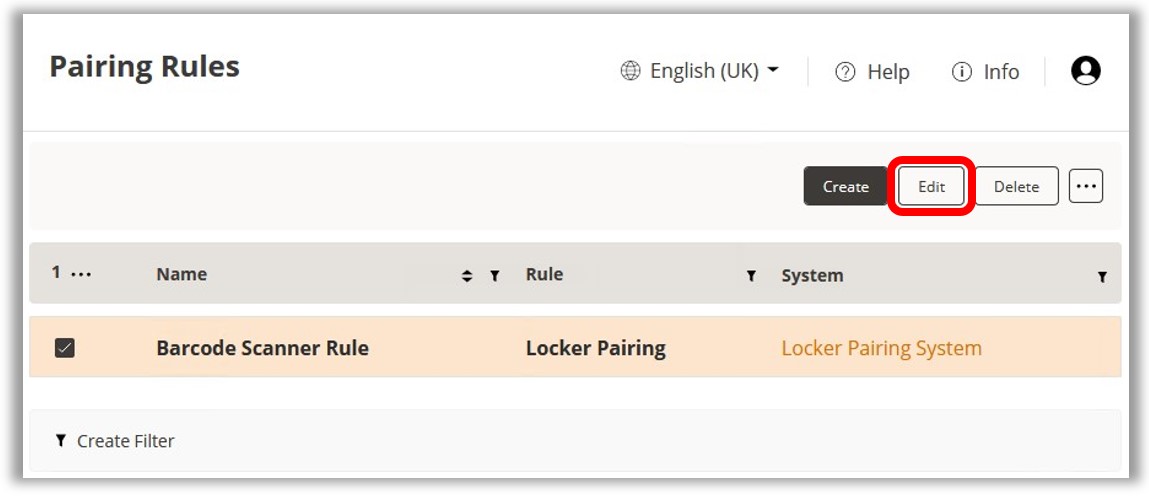
Select one of the existing Locker Pairing rules and either click on
Edit on the Ribbon Toolbar or double-click on the selected
rule to start editing it.
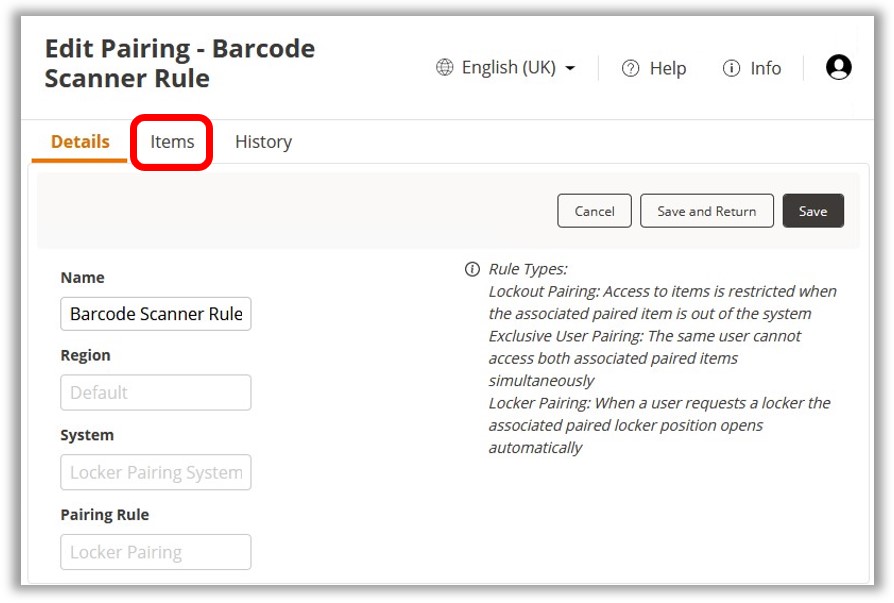
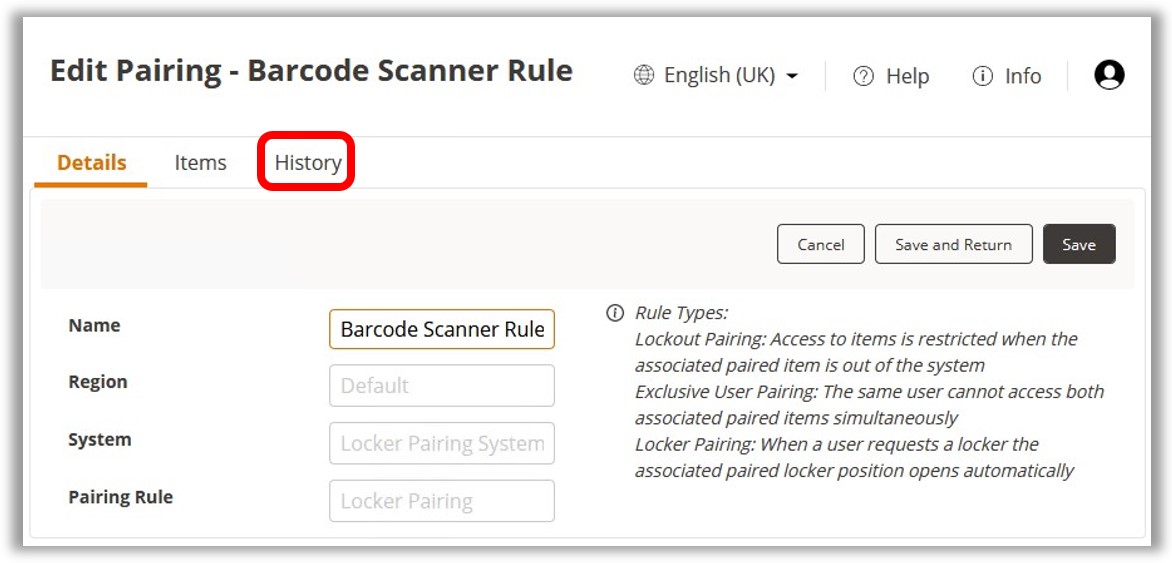
You will be redirected to the Edit Pairing rule Details page.
You will notice that you cannot edit any of the Region, System, or
Locker Pairing Rule Type details.
NOTE: Once
a rule has been created, you will not be able to change its selected
Region, System, or Pairing Rule Type. If that is the case, you will
need to delete the rule and create a new one instead.
Select the Items tab.
In the Items tab, change
your selection of Primary and/or Secondary items in the Pairing Rule
as required.
Click on Save and
Return.
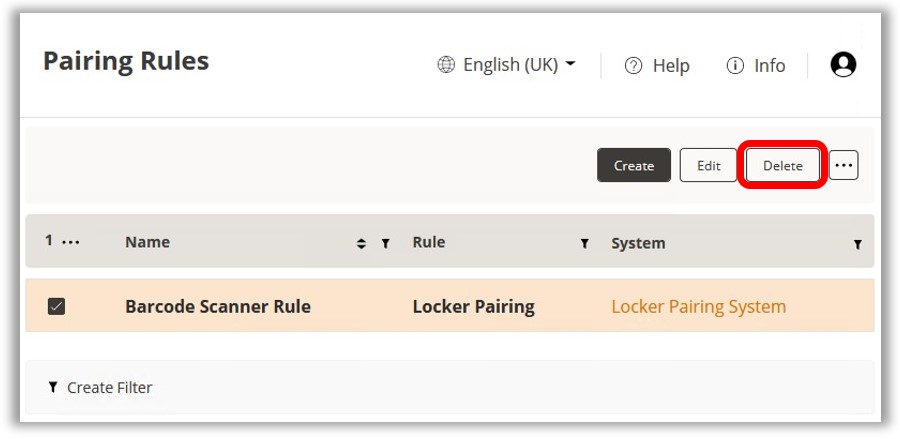
To delete a Locker Pairing rule, navigate to the Pairing Rules page where all the current Locker Pairing rules will be displayed.
Select one of the existing Locker Pairing rules that you wish
to delete and then click on the delete button on the Ribbon Menu.
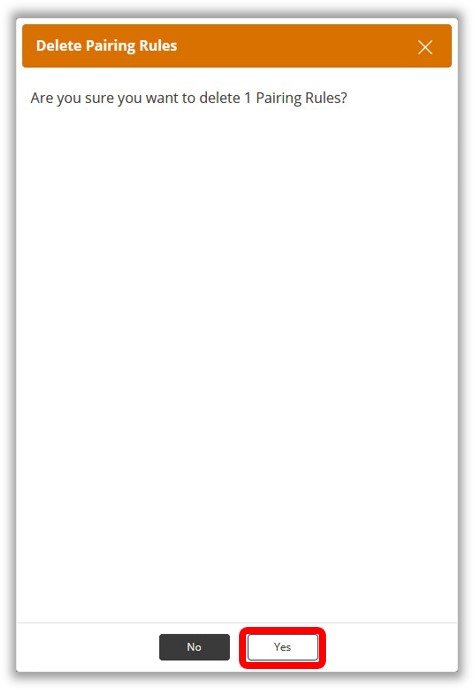
A
window will appear asking you to confirm that you wish to delete the
selected Item Pairing Rule. Select Yes to continue.
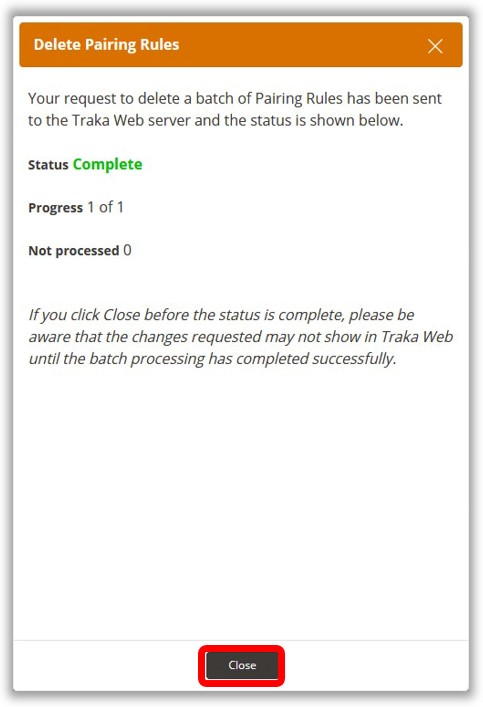
The
rule will now be deleted.
Click
on Close to exit from the window.
When the Locker Pairing feature is enabled on Fixed Return to Single System systems, the items associated with selected Locker Pairing Rules are accessible at any time, provided that the Locker Pairing Rule’s conditions have been met and the user who is trying to access the items has been authorized to remove them from the affected system(s).
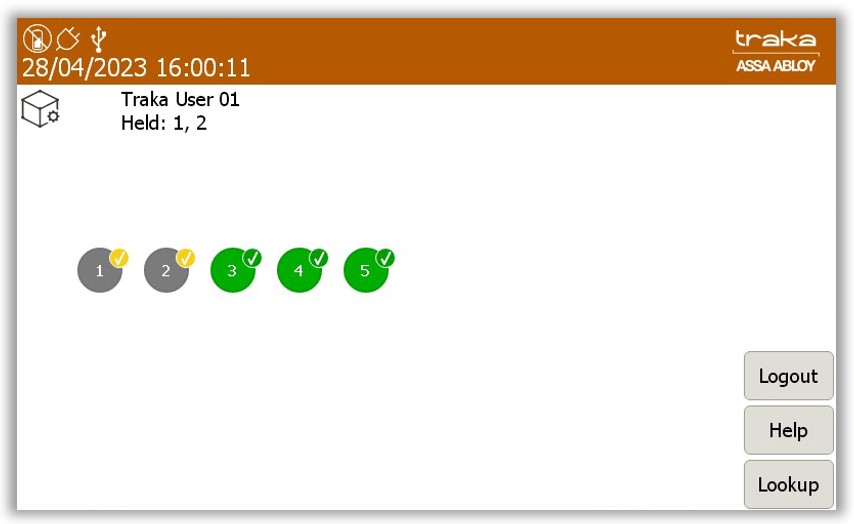
Once a Locker Pairing Rule has been set in place in TrakaWEB, the feature will work on the selected system as soon as the synchronisation completes. In the example below, the following Pairing Rule has been created:
The item in Position 1 has been set as the primary item, and the item in Position 2 has been set as the secondary item.
Two users are registered on the system: Traka User 01 and Traka User 02. Both users have been granted access to all locker compartments in the system.
NOTE:
The primary compartment is RFID, and the secondary compartment is non-RFID.
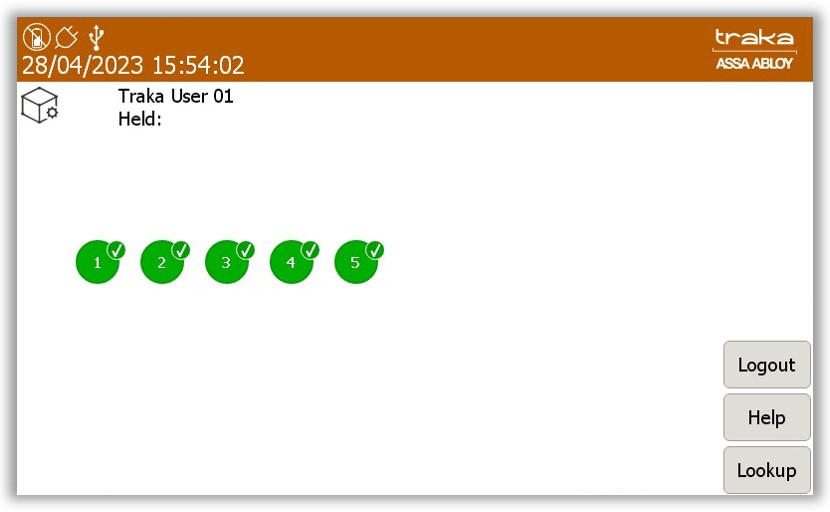
When Traka User 01 logs into the affected Traka Touch system,
they can remove any item from it. In the example below, the primary
item in Position 1 has been chosen.

The moment position 1 is selected, the doors to both position
1 and position 2 will open.
NOTE:
If a user has only been granted access to a primary item, then the
secondary door will not open.
NOTE:
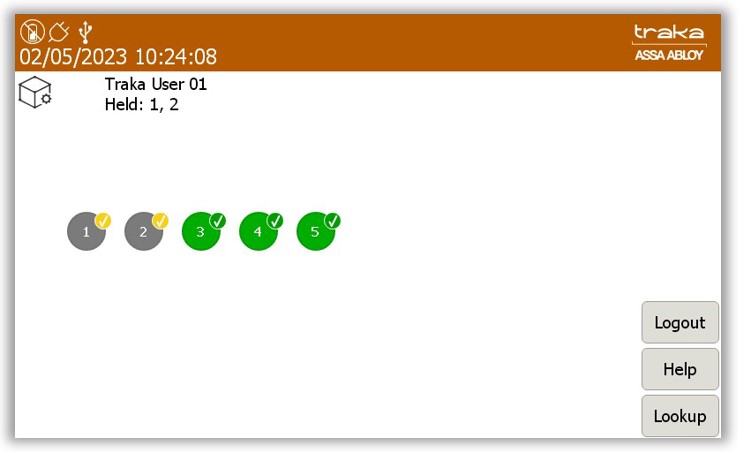
The status of the system icons will not change until the items have
been removed.
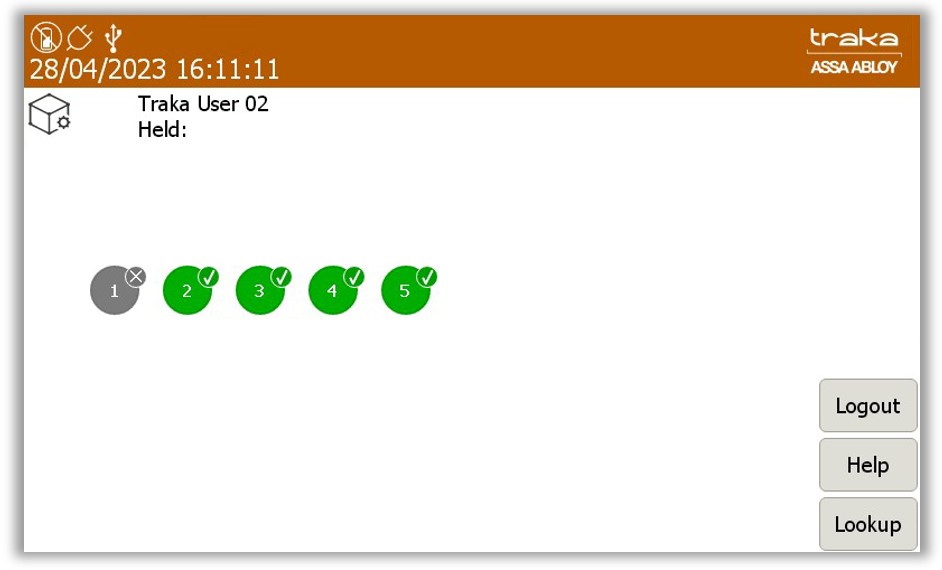
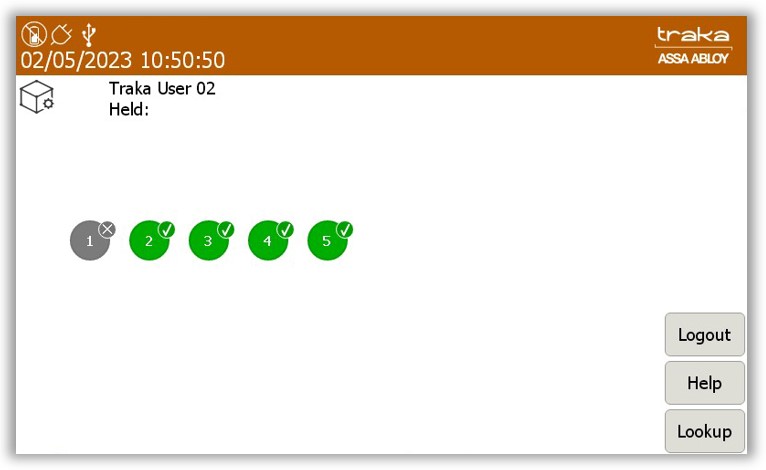
When Traka User 02 logs
into the system, they will see that the primary item is no longer
available, but the secondary items compartment can still be accessed.
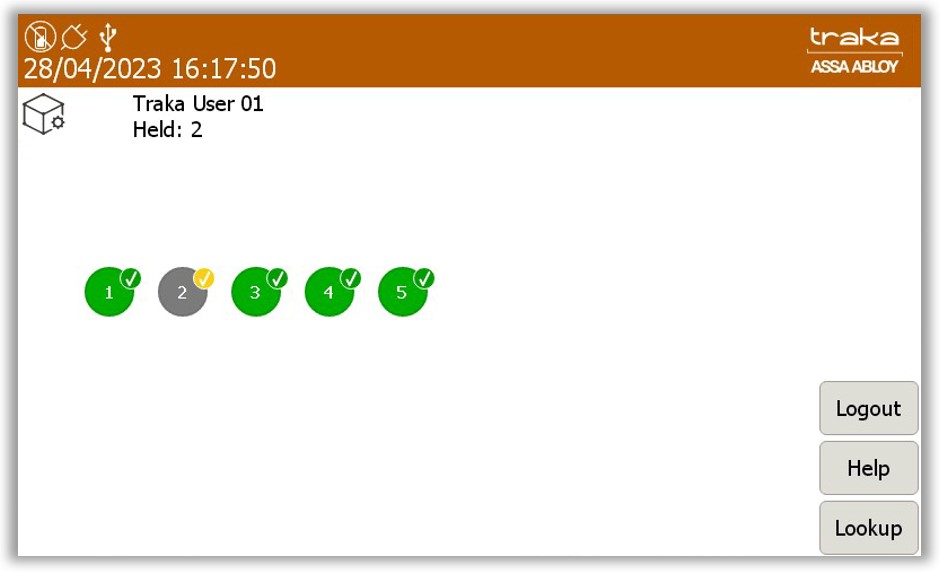
Traka User 01 logs into the system again and returns the primary
item to position 1, It then becomes available once again to both users.
Should any users require another item from the secondary position,
they may log in and select position 2. In this instance, only the
door to position 2 will open. A primary item will still be available
if required.
Locker Pairing with multiple primary items will allow more than one
user to take a primary and secondary item from the locker system. In the
example below, the following Pairing Rule has been created:
Positions 1 and 3 have been set to hold the primary items and position
2 has been set to hold the secondary items.
When Traka User 01 logs into the affected Traka Touch system,
they can remove any item from it. In the example below, the primary
item in Position 1 has been chosen.
The moment position
1 is selected, the doors to both position 1 and position 2 will open.
NOTE:
If a user has only been granted access to a primary item, then the
secondary door will not open.
NOTE:
The status of the system icons will not change until the items have
been removed.
When Traka User 02 logs
into the system, they will see that the primary item in position 1
is no longer available, but the primary item in position 3 is available
and so too are the secondary items in position 2.
When User 2 selects
position 3, the doors to both position 3 and position 2 will immediately
open allowing the user access to the items. Once the items have been
removed, the display icons will be displayed as shown.
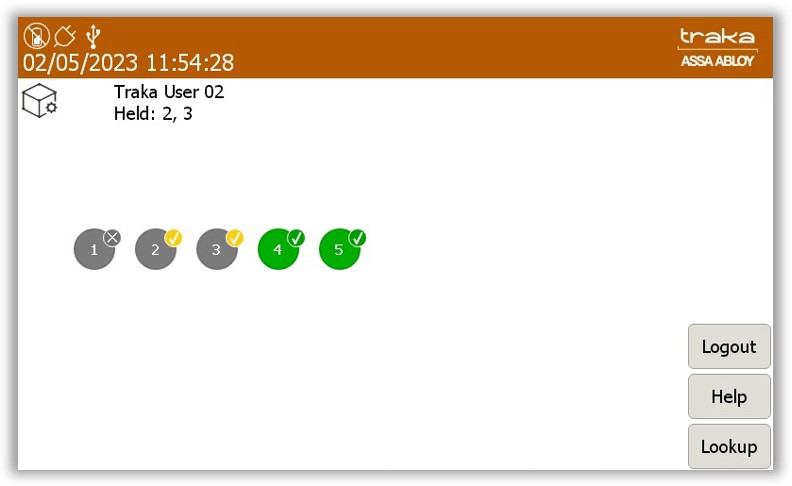
Once both primary items have been taken, then only the secondary items
in position 2 will be available.
Once all the items have been returned by both users, all primary and
secondary items will once again be made available.
Should any users require another item from the secondary position,
they may log in and select position 2. In this instance, only the
door to position 2 open. A primary item will still be available if
required.

Since Locker Pairing is a security feature, for the safety of users and property, there is no option available to grant users permissions to override the Locker Pairing.
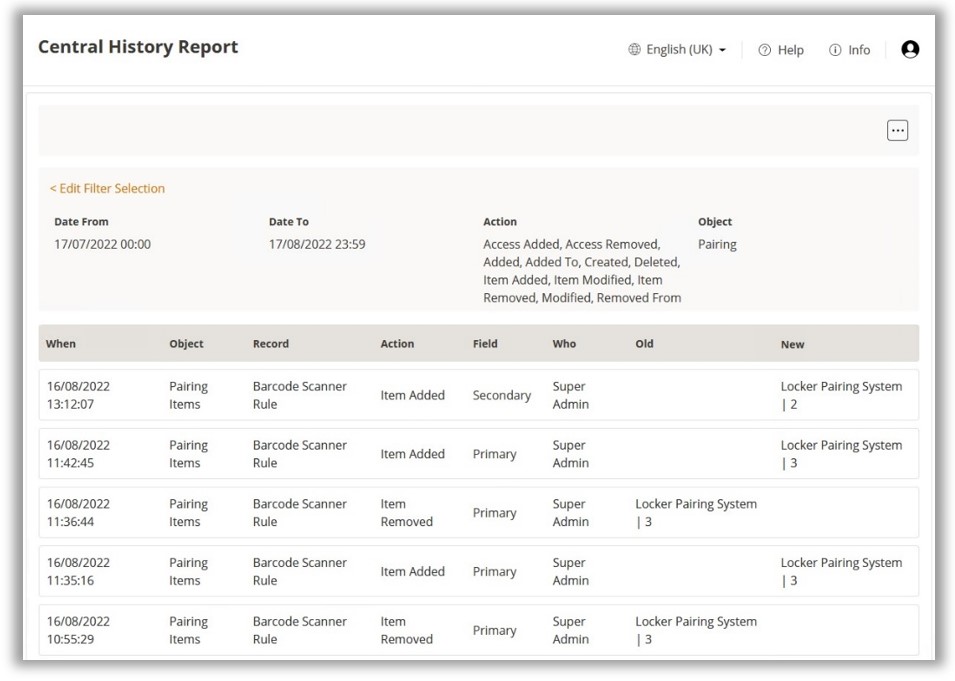
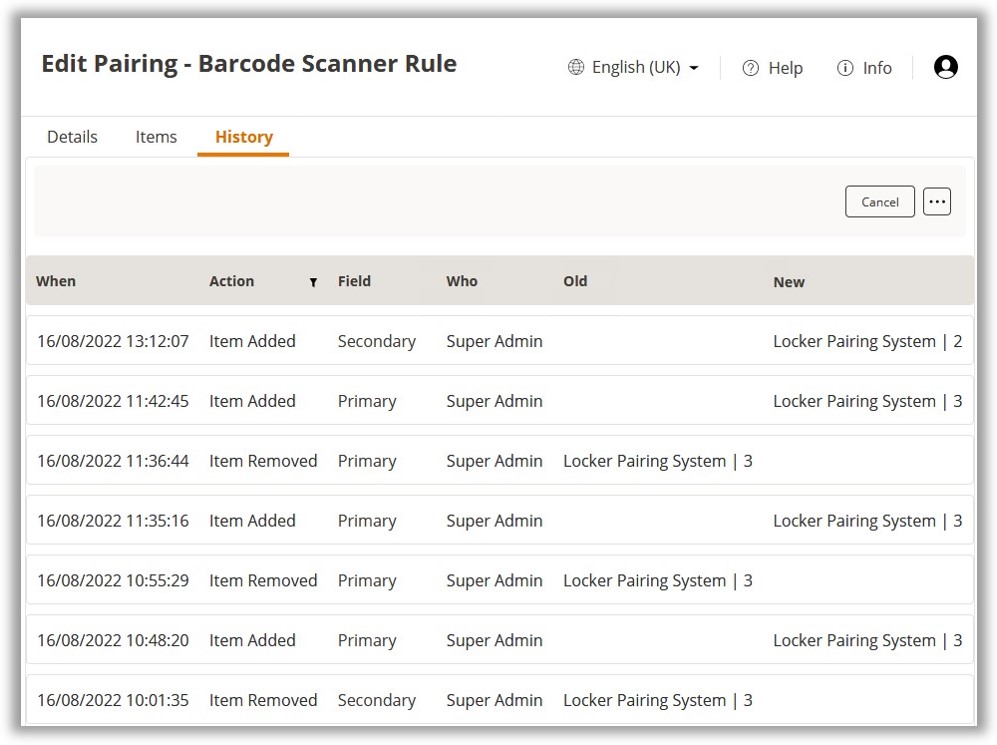
For the purposes of audit, all the changes in the Locker Pairing Rules are recorded in the History tab for each Item Pairing rule.

TrakaWEB will then display
all the current Item Pairing rules that exist within the database.
Select one of the existing Item Pairing rules and either click on
Edit on the Ribbon menu or double-click on the selected rule
to start editing it.
You will be redirected to the Edit Pairing Details page.
Select the History tab.
You will then see the recorded history of all the changes to that Locker
Pairing Rule.
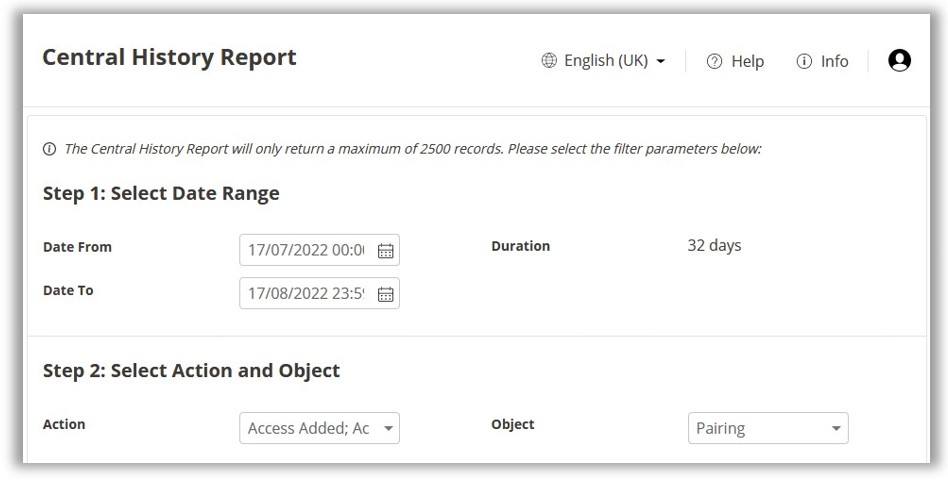
All the events related specifically to the Locker Pairing Rules will be visible in the Central History Report. You can also create a Central History Report and specifically choose Pairing as the Object for the report. To read more on how to generate such a report, please refer to the General Reports section in this document.