General Reports
The General Reports comprises of 2 report categories:
Activity Report
Central History Report
Activity Report
The Activity Report provides a pre-filter page specific to all system,
iFob and Item Activity. It is divided into 3 sections to allow for a date
range, activity type and a specific record selection. It will allow a
maximum return of 60,000 records.
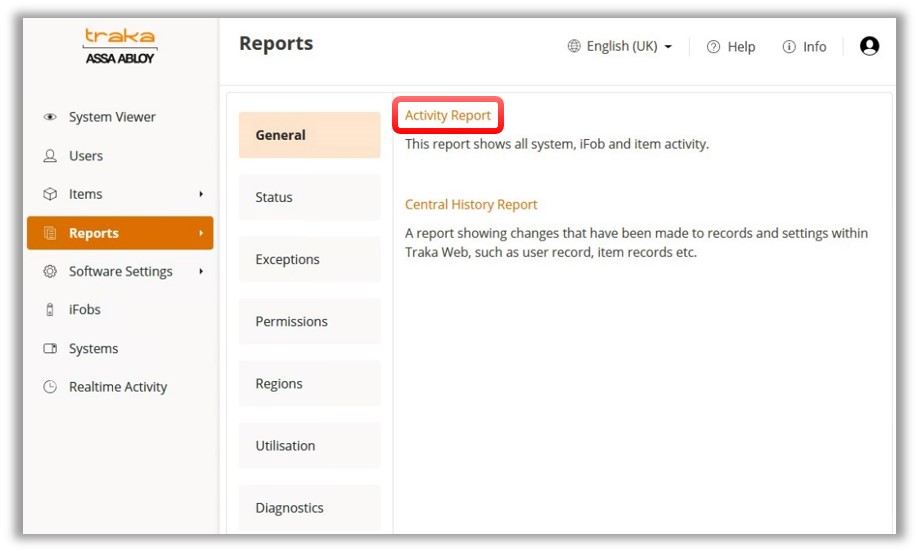
Click the Reports tab on the Navigation Menu.
Select the View Reports
tab followed by the General tab.
To view the Activity
Report, click on the link.
You will now be presented with the pre-filter page for the Activity
Report.
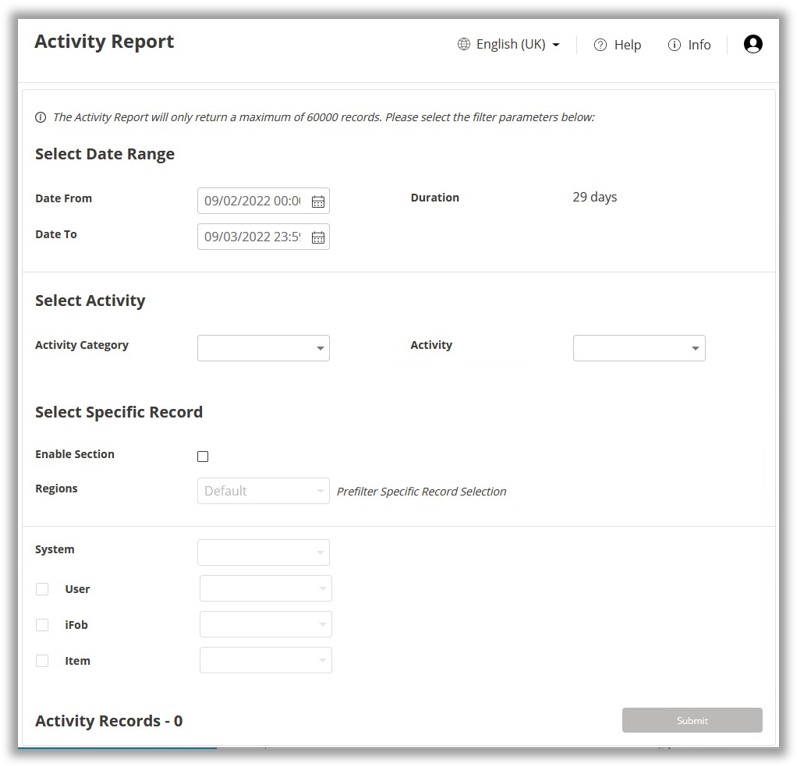
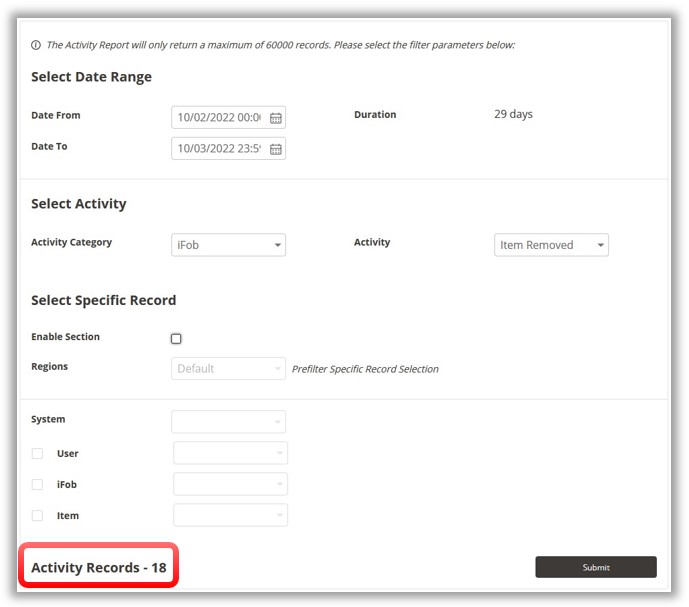
From the above example, the pre-filter page is divided up into 3 steps,
concluding with a Submit option.
Step
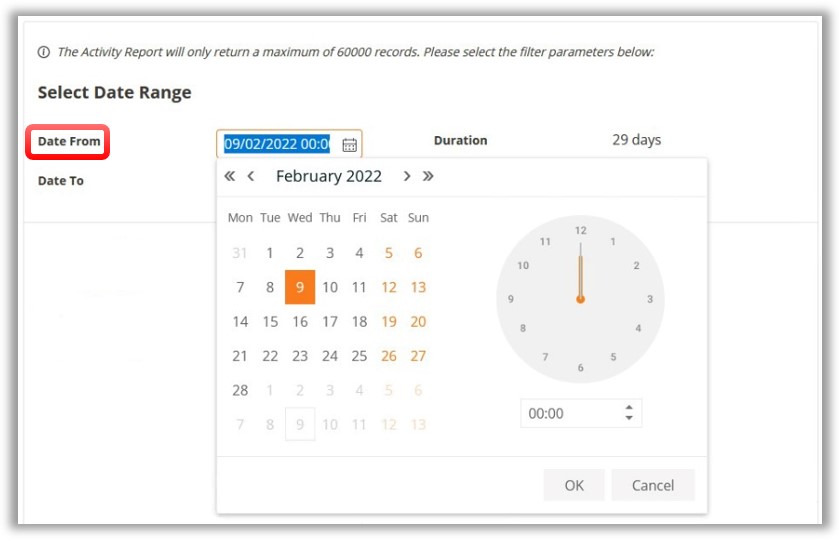
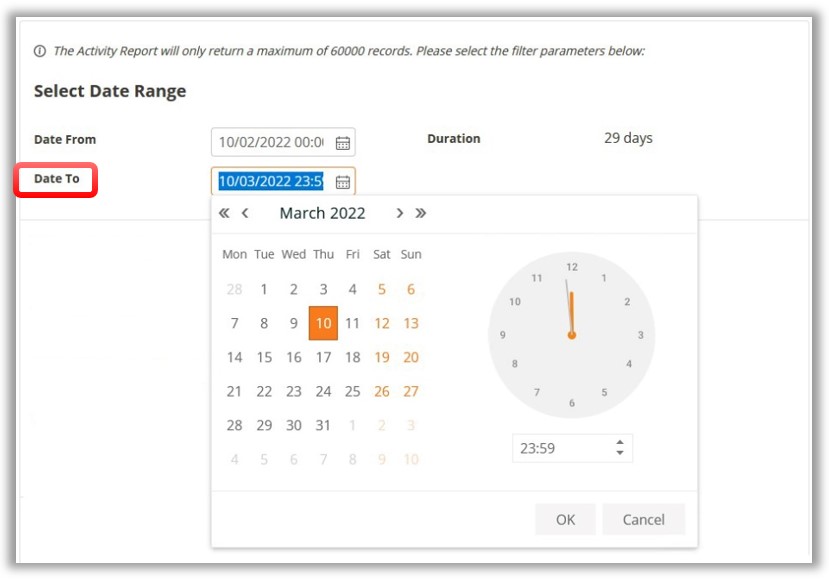
1: Select Date Range
The Select Date Range comprises
of 2 drop-down options to allow you to select both a start date and
an end date. It will also display the overall duration.
Step
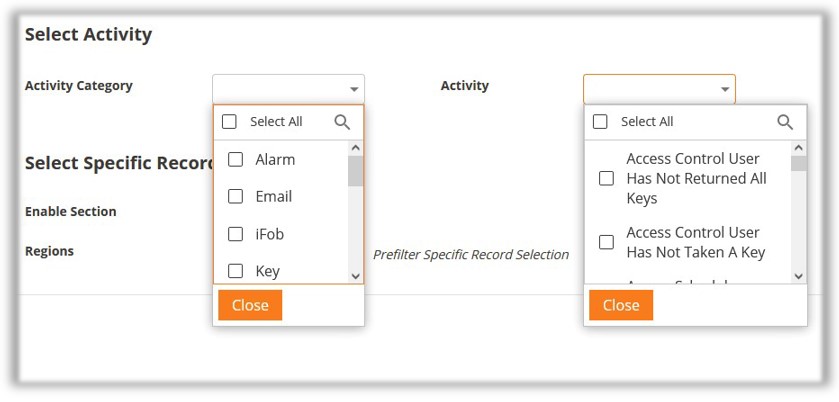
2: Select Activity
The Select Activity comprises
of 2 drop-down menus. From the Activity
Category menu, you can select from a list of different categories.
These can be either selected individually or all at once. From the
Activity menu, you can select
from a list of different activities. These also can be selected individually
or all at once.
Step3:
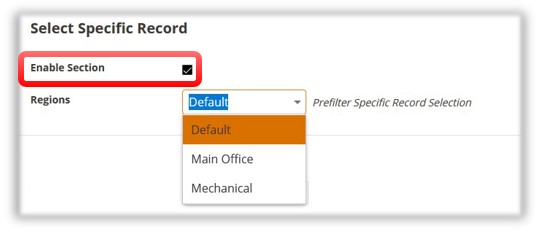
Select Specific Record
The Select Specific Record
is an optional step. It can be enabled by selecting the Enable
Selection checkbox as shown below.
NOTE: If the checkbox is not selected, activity
records will still be generated for the options selected in Step 2
as shown in the example below.
With the Enable Section checkbox selected, you will also be able
to choose a system from the selected region, a User, an iFob, and an Item
as required by following the steps below.
From the System drop-down menu, select a system.
Select the User checkbox to choose a user from the User
drop-down menu.
Select the iFob checkbox to choose an iFob from the iFob
drop-down menu.
Select the Item checkbox to choose an item from the Item
drop-down menu.
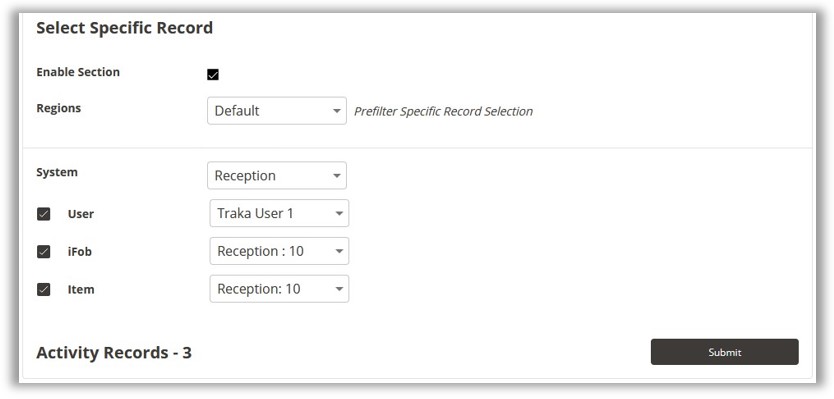
Once you have finished making your selections, click on the Submit
button.

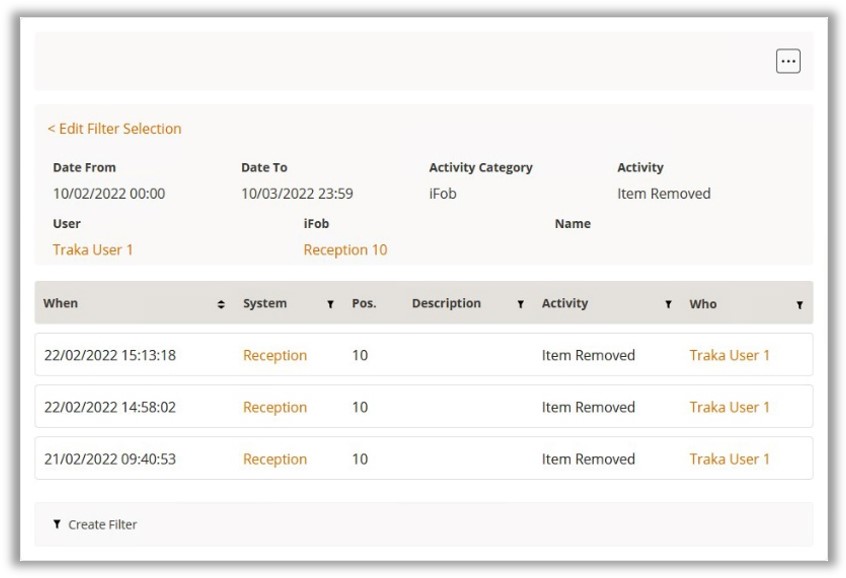
The final report will provide a summary of the options that were selected
and the overall report for those options.
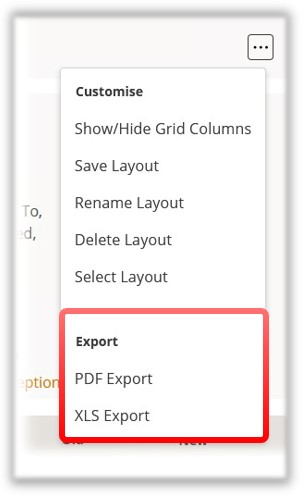
Selecting the Ellipsis button will allow you to export the Activity
Report to an XLS or PDF file as required.

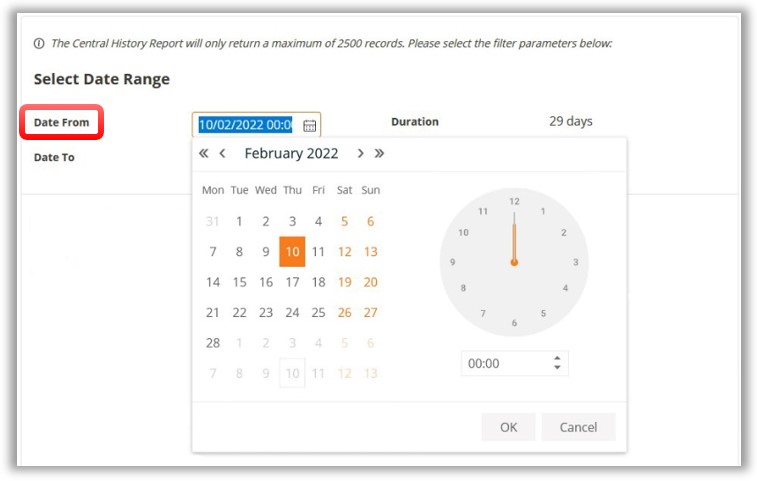
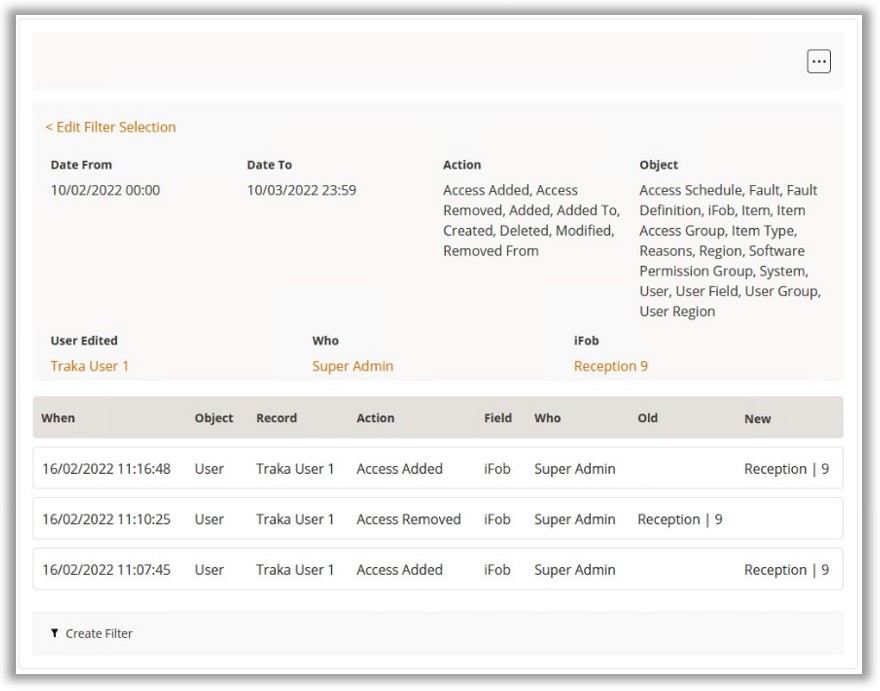
Central History Report
The Central History Report provides a pre-filter page that will show
any changes that have been made to records and settings within TrakaWEB.
It is divided into 3 sections to allow for date range, actions and a specific
record selection. It will allow a maximum return of 2,500 records.
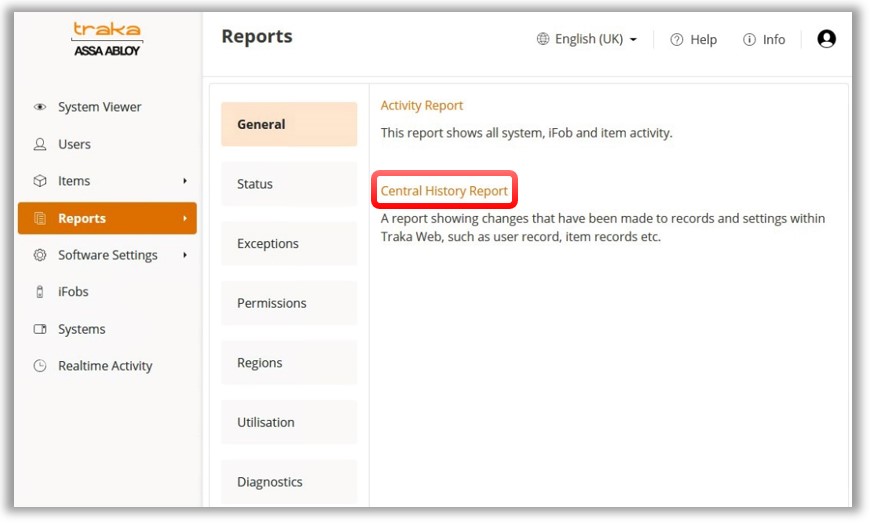
Click the Reports
tab on the Navigation Menu.
Select the View Reports tab followed by the General
tab.
To view the Central
History Report, click on the link.
You will now be presented with the pre-filter page for the Central
History Report.
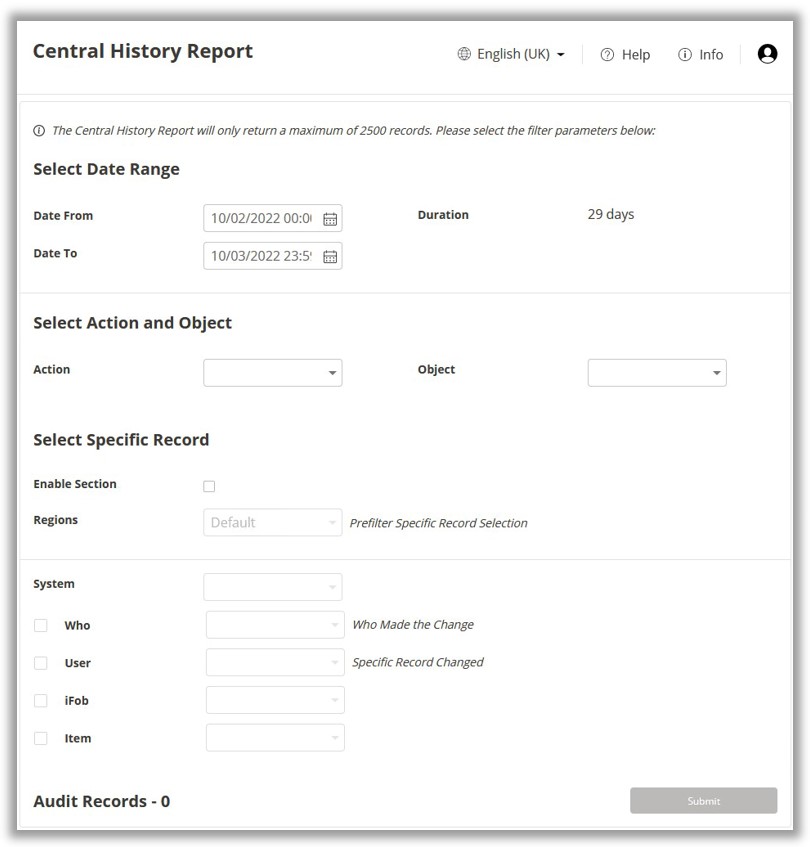
From the example above, the pre-filter page is divided up into 3 steps,
concluding with a Submit option.
Step1:
Select Date Range
The Select Date Range comprises
of 2 drop-down options to allow you to select both a start date and
an end date. It will also display the overall duration.

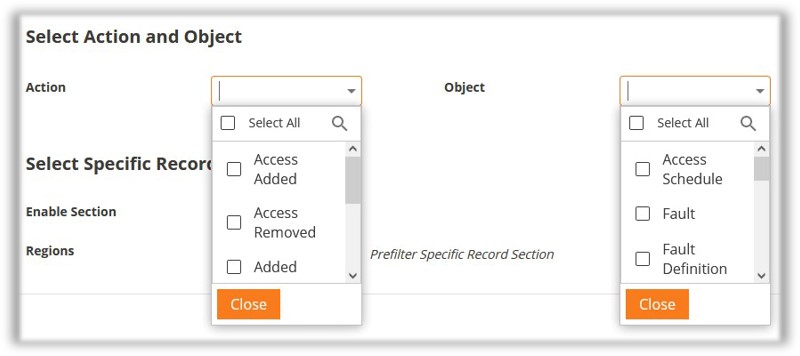
Step
2: Select Action and Object
The Select Action and Object
section comprises of 2 drop-down menus. From the
Action menu, you can select from a list of different categories.
These can be either selected individually or all at once. From the
Object menu, you can select
from a list of different categories in relation to the selected actions.
These also can be selected individually or all at once.
Step
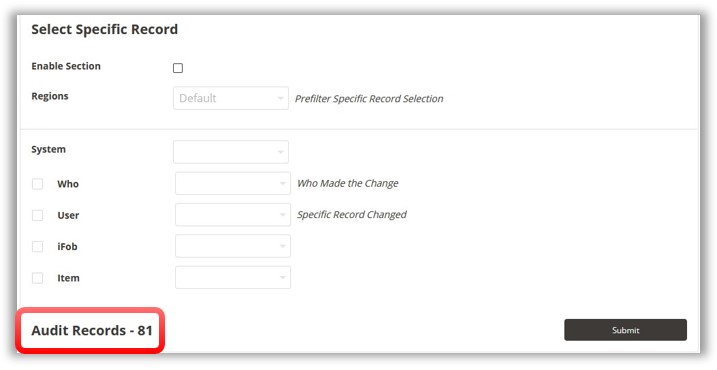
3: Select Specific Record
The Select Specific Record
is an optional step. It can be enabled by selecting the Enable
Section checkbox as shown below. With the option enabled, you
may then select a specific region.

NOTE: If the checkbox is not selected, activity
records will still be generated for the options selected in Step 2
as shown in the example below.
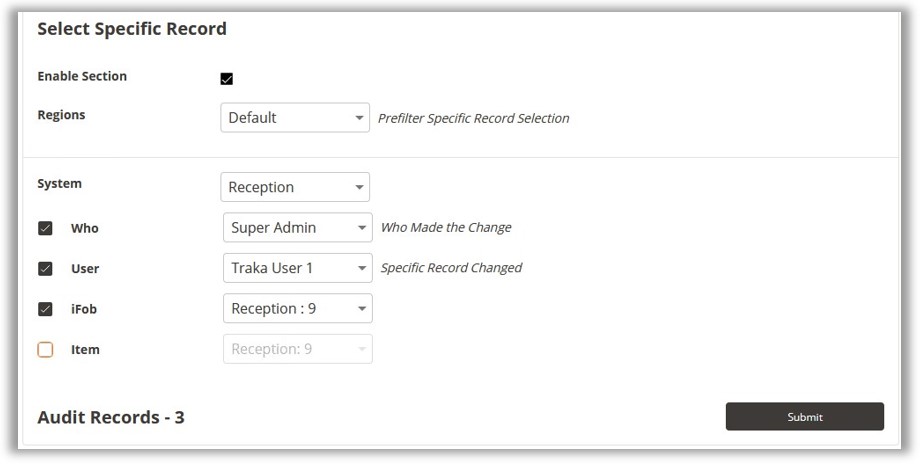
With the Enable Section checkbox selected, you will also be able
to choose a system from the selected region, a User who made the change,
a user specific record change, an iFob, and an Item as required by following
the steps below.
From
the System drop-down menu, select a system.
Select
the Who checkbox to select a user who made the change.
Select
the User checkbox to choose a user from the User drop-down
menu.
Select
the iFob checkbox to choose an iFob from the iFob drop-down
menu.
Select the Item
checkbox to choose an item from the Item drop-down menu.
Once you have finished making your selections, click on the
Submit button.

The final report will provide a summary of the options that were selected
and the overall report for those options.
Selecting the Ellipsis button will allow you to export the Activity
Report to an XLS or PDF file as required.