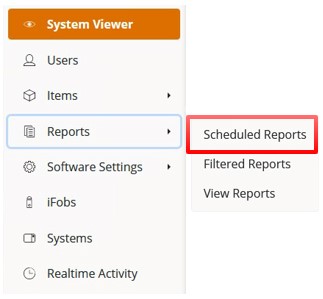
To create a Scheduled Report. Select Scheduled Reports from
the Reports tab on the Navigation Menu.
You will now be taken to the Scheduled Reports Landing Page.
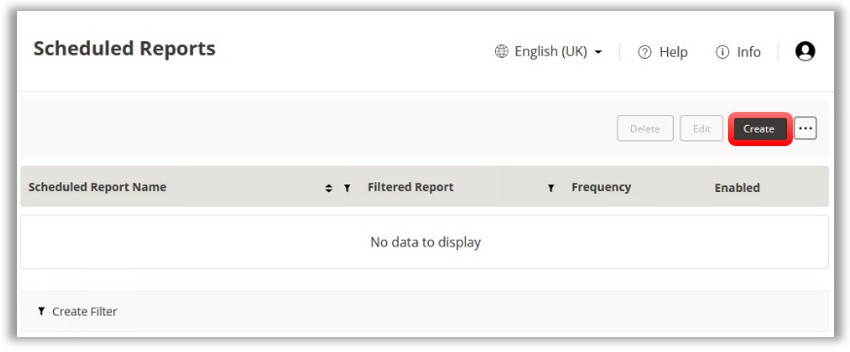
To create a new Scheduled
Report, click on the Create
button located on the Toolbar.
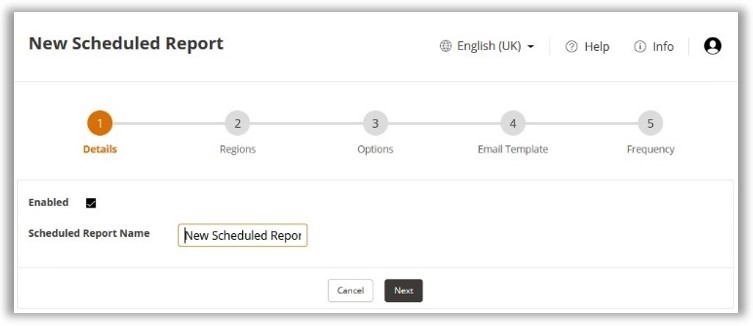
Step 1 – Scheduled
Report Details
At the Scheduled Report Details
page, complete the details as required. By default, the Enabled
check box will be ticked. This will determine if the current Scheduled
Report will be active. Once completed, click on Next.
Step 2 – Scheduled
Report Regions
At the next page, you will be required to select the regions
for the Scheduled Report. By default, all available regions will be
selected.

NOTE:
Unchecking the ‘All Regions’ checkbox will enable you to select the
regions individually.
Once you have made your
selection, click on Next
to continue.
Step 3 – Scheduled
Report Options
The next step will require you to select the Scheduled Report Options.

Filtered
Report:
Select from a list of existing Filtered Reports
Report
Format:
Choose from either PDF or Excel as the submitted report
Report
Locale:
Select a language for the report
Send
Empty Reports:
Enabling this check box will allow reports containing no information
to be sent
Once you have made the required selections, click on Next
to continue.
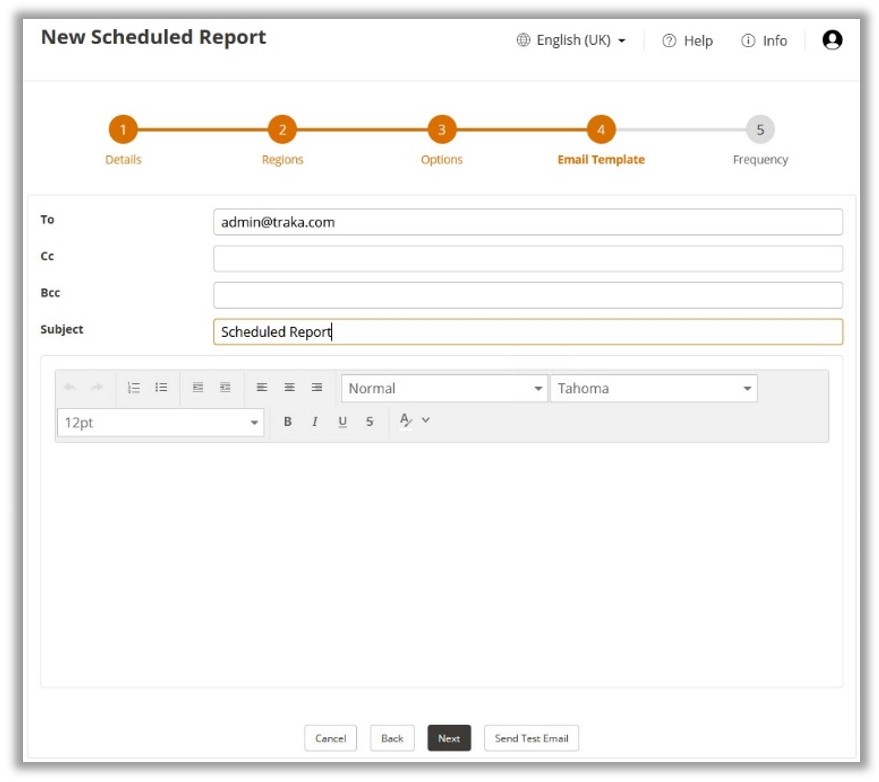
Step 4 – Email Template
At the next page, you will be required to fill out the details for
the email template. This will include the recipients email address,
the subject name and the main body text as required. If needed, a
test email may be sent by clicking on the Send
Test Email button.
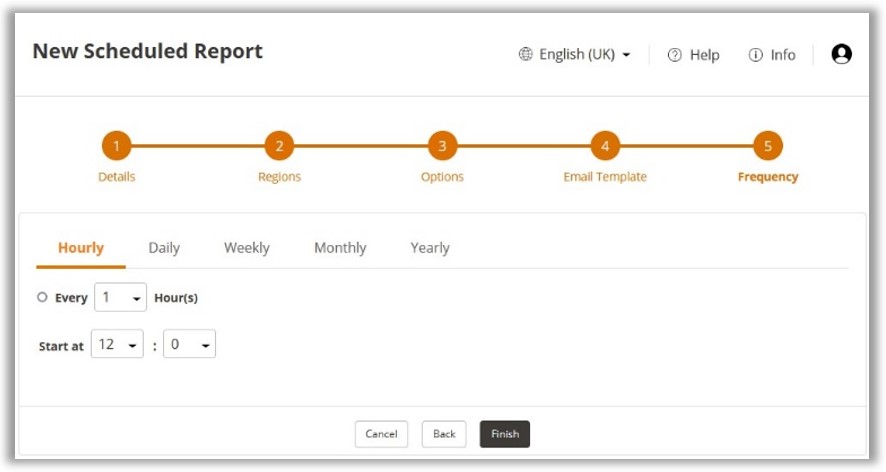
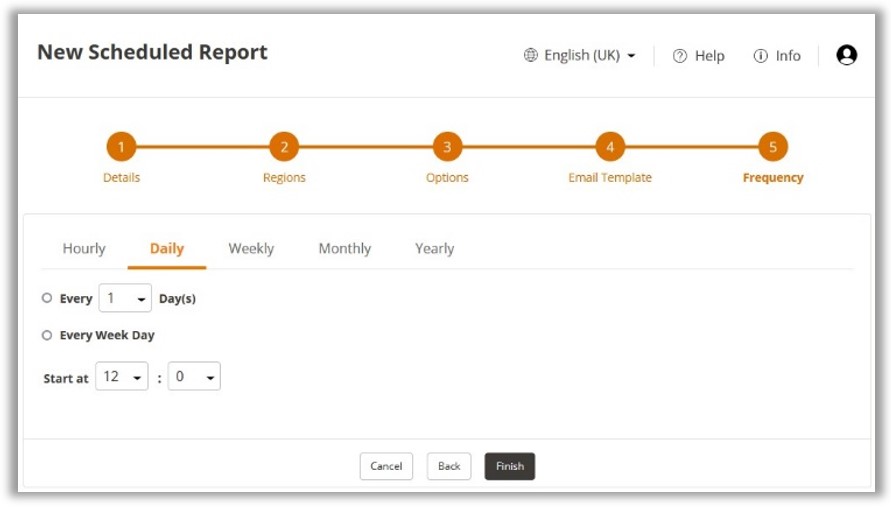
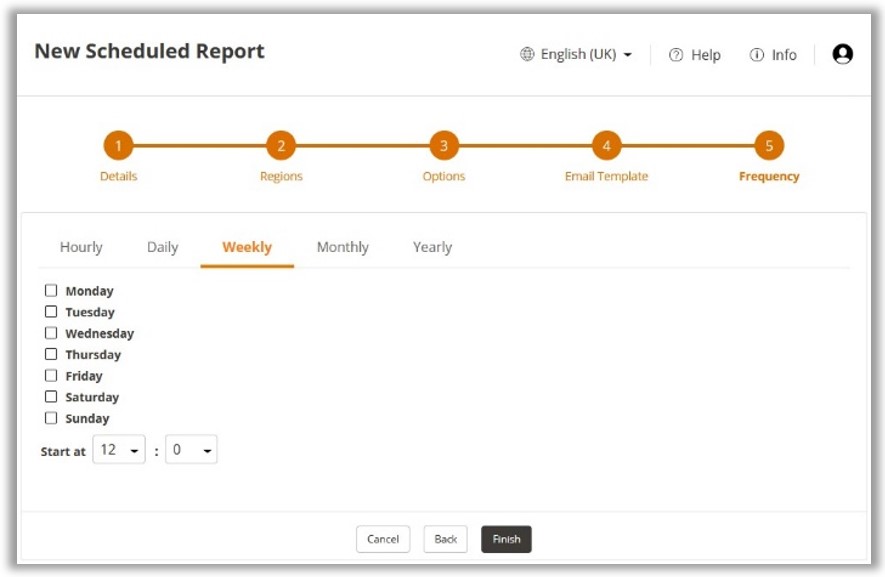
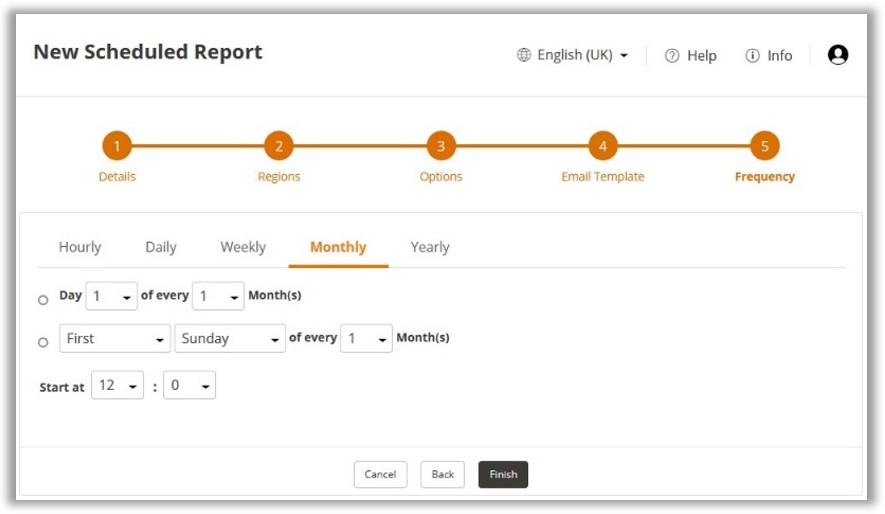
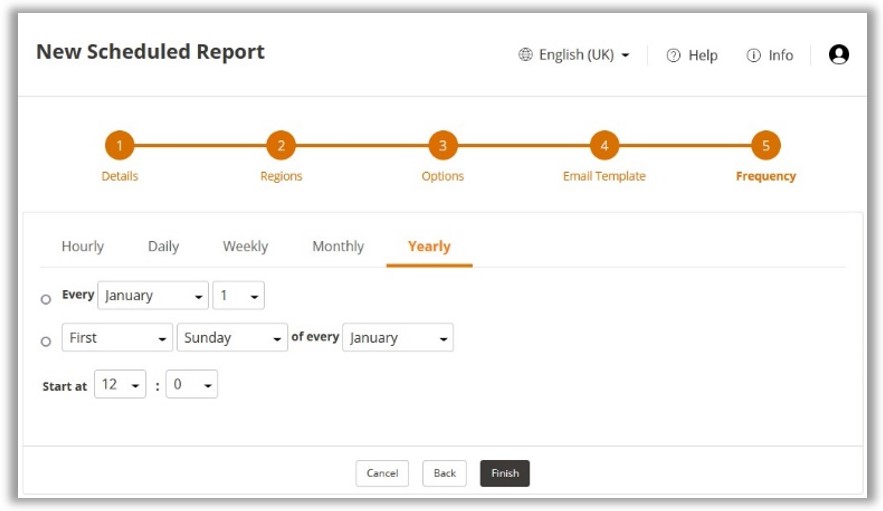
Step 5 - Frequency
At the next page, you will be required to select the frequency for when the Scheduled Report will be sent. Below is an overview of the options for each tab.
Hourly