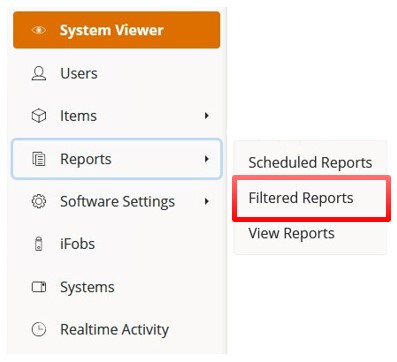
To create a Filtered Report. Select the Filtered
Reports icon from the Reports tab on the Navigation Menu.
You will now be taken to the Filtered Reports Landing Page.
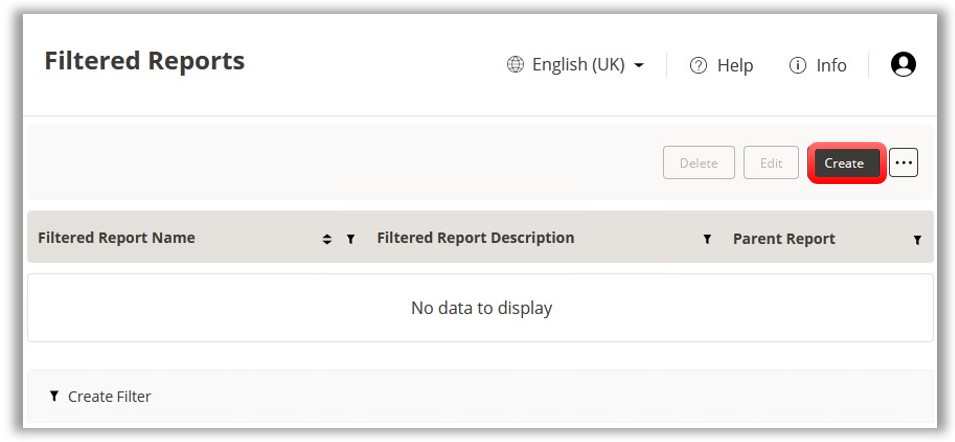
To create a new Filtered Report click Create
on the Toolbar.
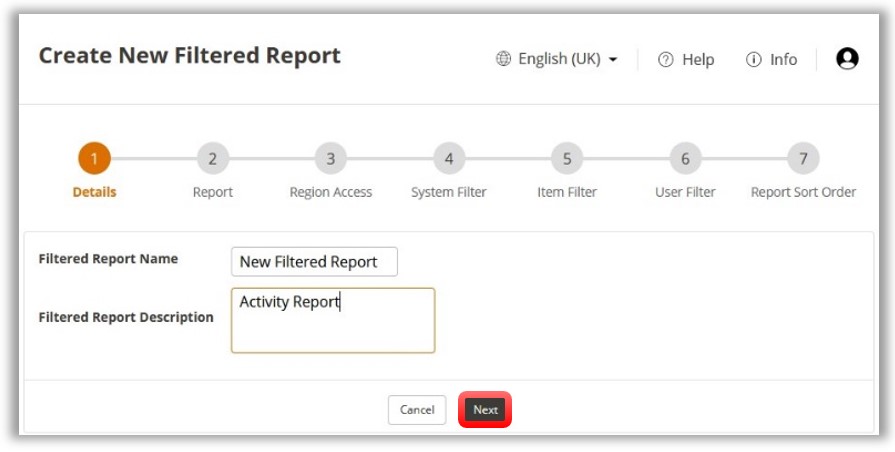
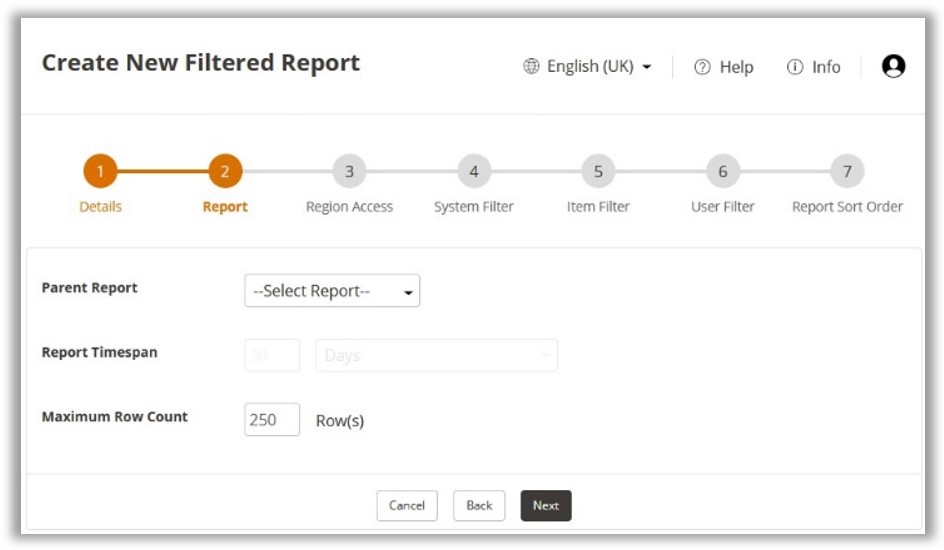
Step 1 – Filtered
Report Details
At the Filtered Report Details
page, complete the details as shown in the example below. Once completed,
click on Next.
Step 2 - Report
The next step will require you to select the Parent Report and
the Report Timespan as well as the Maximum Row Count.
From the drop down menu, select the required report.
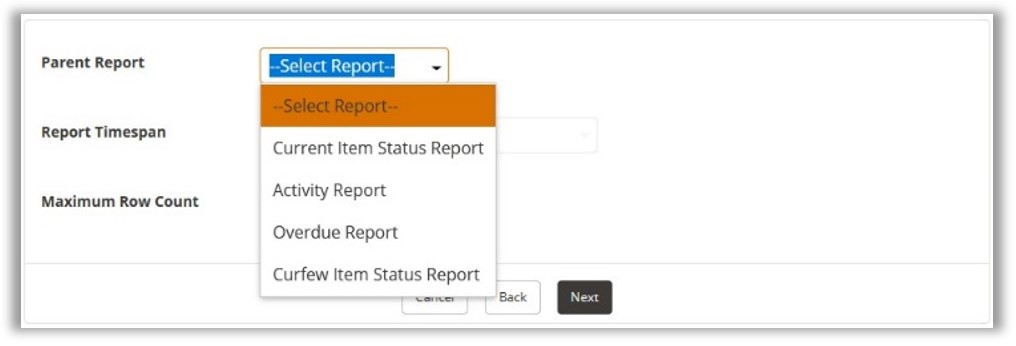
Next, insert a value
for the Report Timespan. The default is set to 30 days. The
timespan may also be changed from days to hours as required. You also
have the option to set a maximum row count. The default is set to
250 rows.
Once you have made your selection, click on Next
to continue.
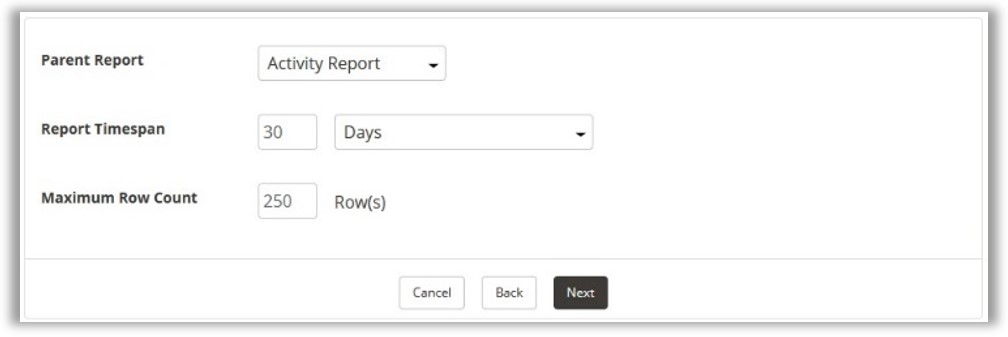
Step 3 - Regions
The next step will require you to select from your list of available
regions. These may be selected individually or all at once by clicking
on the All Regions checkbox as shown below.
Once you have completed
your region selection, click on Next
to continue.
Step 4 – System Filter
At the next page, you will be required to select from the list of available
systems. These may be selected individually or all at once by clicking
the All Systems checkbox as shown.
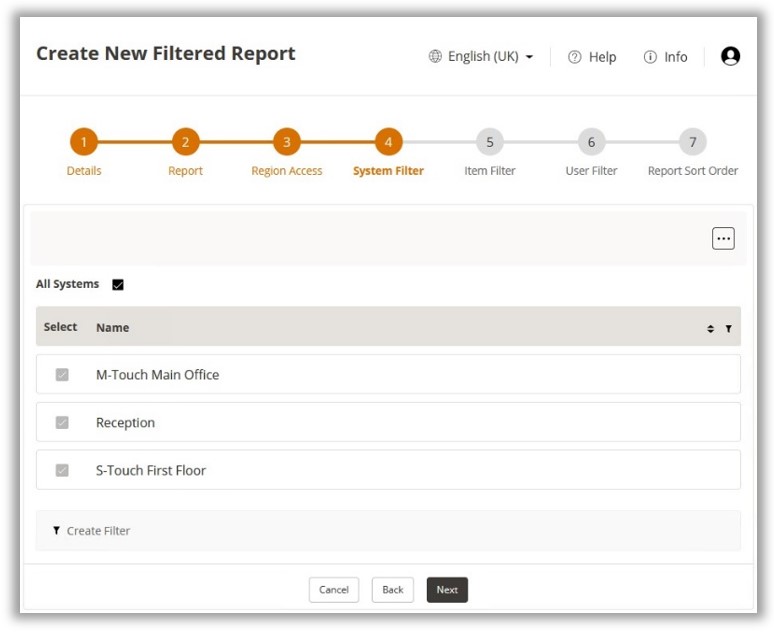
Once you have selected the required systems, click on Next
to continue.
Step 5 – Item Filter
The next page will require you to choose which items you wish to add
to the filter. All the items for the selected system/s will be displayed.
These may be selected individually or all at once by clicking the
All Items checkbox as shown.

Once you have selected the required items, click on
Next to continue.
Step 6 – User Filter
At the User Filter page,
you will be required to select from the list of available users. All
users for the selected system/s will be displayed. These may be selected
individually or all at once by clicking the All Users checkbox
as shown.
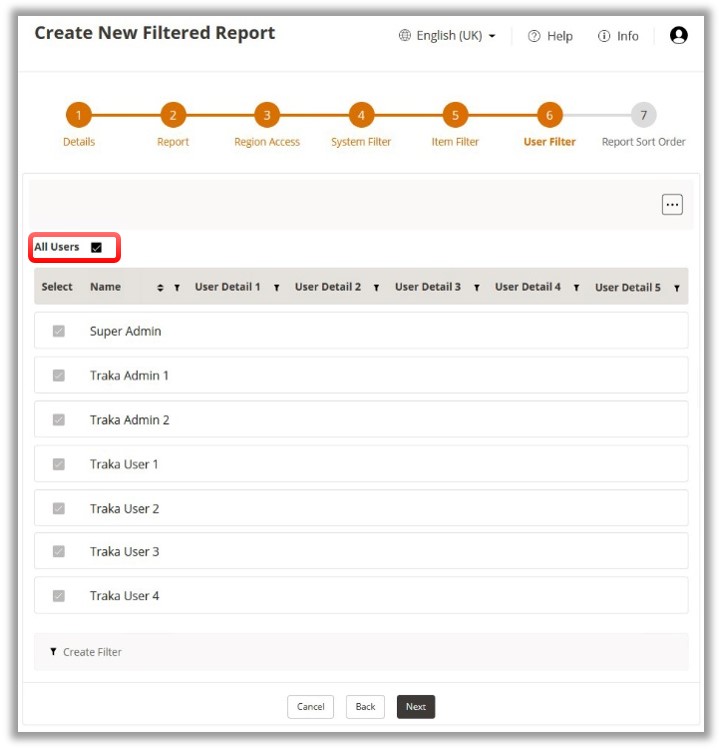
Once you have completed the User selection, click on Finish
to complete the process.
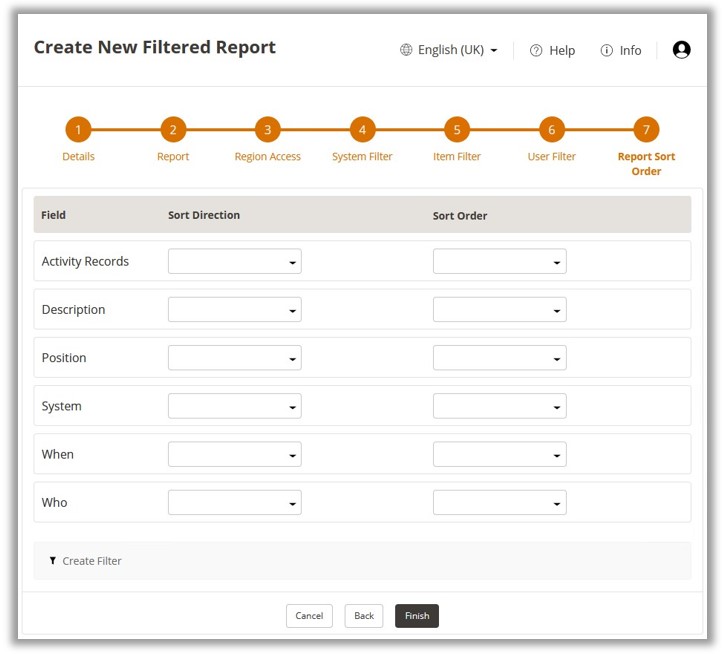
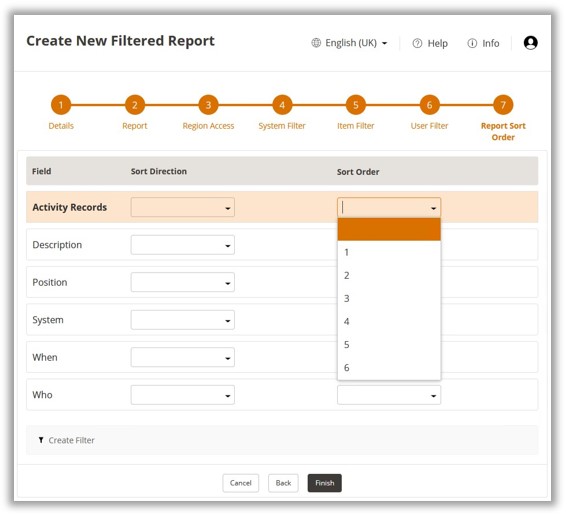
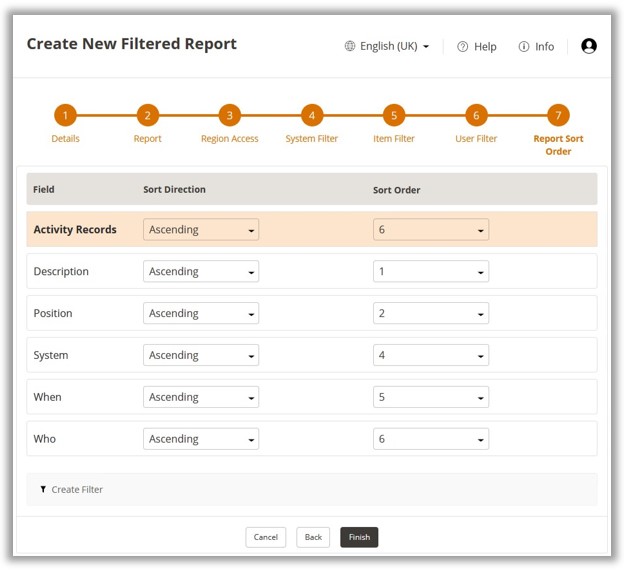
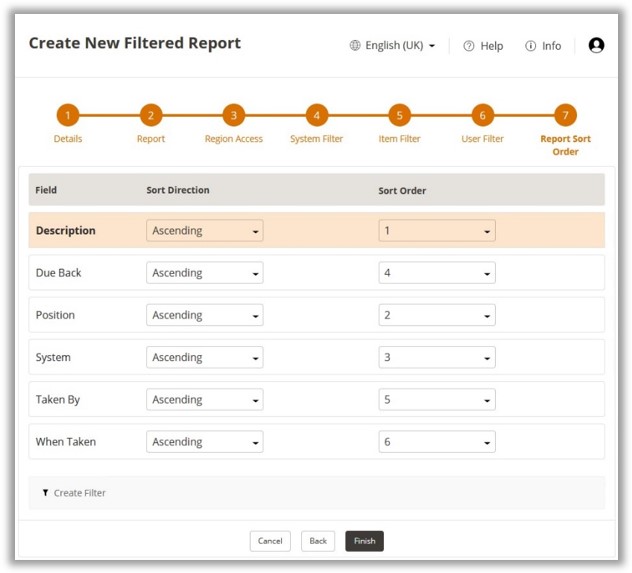
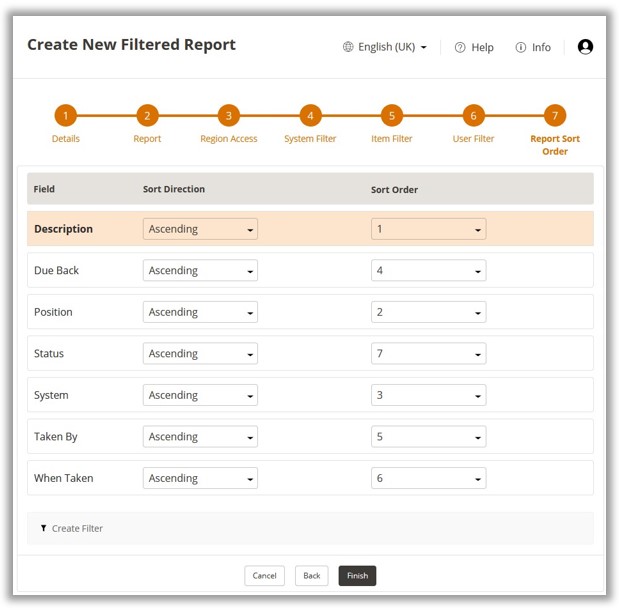
Step 7 - Report Sort
Order
The Report Sort Order
page will enable you to arrange the filtered report according to your
requirements. It comprises of 2 customisable sections based on the
selections made in the previous steps.