Item Pairing allows the TrakaWEB administrator to arrange Items in pairs or groups. Moreover, you can decide how the paired items will behave. Item Pairing can be arranged in accordance with either of the two different rule types and you will need to choose which rule type is more appropriate for your chosen items:
Exclusive User Pairing |
Lockout Pairing |
|
|
To demonstrate the power and potential application of the Item Pairing feature, consider the following examples:
Exclusive User Pairing: A company has a security safe and two associated keys (the primary key and the spare) stored in a Traka Touch system. The feature will prevent an authorised user from taking both keys at once. One user can only take one key at a time, and they must return the first key to remove the other. Other users can remove the spare in the meantime, as they might need access to the safe as well
Lockout Pairing: A company has an engine room and a number of electrical boxes in the engine room. There is one main engine key (the Secondary key) and a number of keys to different electrical boxes (Primary keys). The feature will prevent different users from removing the main engine key until all the keys to the electrical boxes have been returned. Conversely, when the main engine key is out of the system, no user will be able to remove any keys to the electrical boxes to prevent any damage to the equipment or harm to the personnel.
NOTE: You can set up as many rules per system as you can have possible item pairings, and one system can work with multiple rules of both types enabled on it.
NOTE: One item can only be assigned to one rule.
Item Pairing can be used on Touch systems working in 2 mutually exclusive modes:
It can be set up on systems working in the Fixed Return to Single System (FRSS) mode OR
It can be set up on systems working in the Advanced First In-First Out (AFIFO) mode.
Should you require a change to your chosen configuration, please contact Traka or your Distributor.
Due to the nature of the Item Pairing feature, it is incompatible with the following features on TrakaWEB/Traka Touch:
Temporary Key Store (TKS)
DockSafe
Rack Manager
To enable Item Pairing on TrakaWEB, at least one of the systems connected to TrakaWEB must be configured to work with the Item Pairing function enabled. To enable Item Pairing for a specific system, you will need to upload an appropriate Config file onto that system.
You will need to decide whether the Item Pairing will be enabled on a FRSS system or a system working in the Advanced FIFO mode as your decision will affect which Config file will need to be uploaded on the affected system(s). To read more about Advanced FIFO, refer to UD0232 – TrakaWEB FIFO and Advanced FIFO User Guide.
To obtain the relevant Config files with the Item Pairing enabled for your systems, contact Traka or your Distributor.
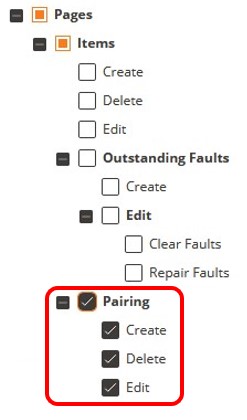
As a TrakaWEB administrator, you may or may not have the necessary permissions to create, edit, or delete Item Pairing rules. To check if your Software Permissions Group has got appropriate permissions, make sure that the following checkboxes relating to the Item Pairing are ticked in the Edit options of your Software Permissions Group. The Item Pairing permissions can be found in the software permissions tree under Web > Pages > Items > Pairing:
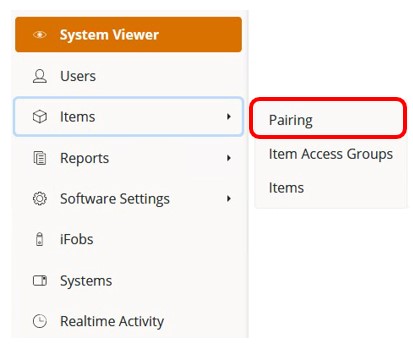
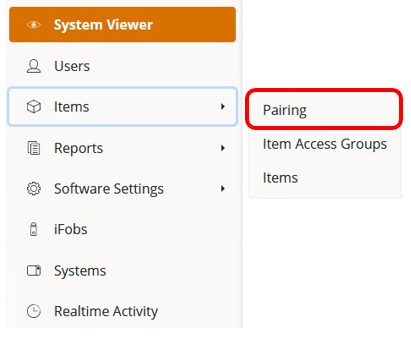
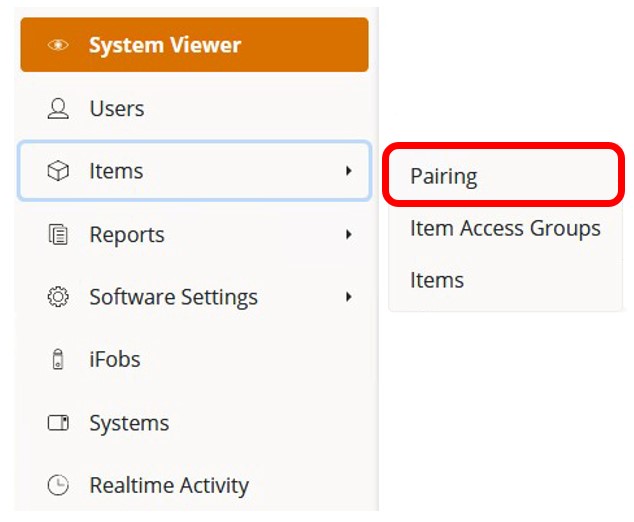
To create an Item Pairing
rule, select Items on the Navigation Menu. The menu will expand
and reveal the Pairing sub-menu:
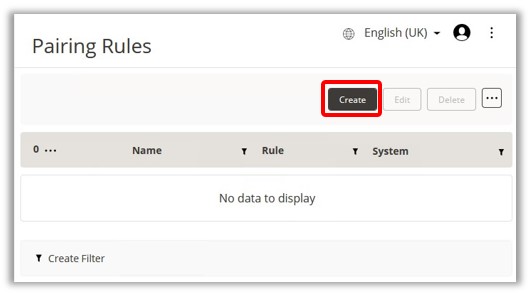
TrakaWEB will then display
all the current Item Pairing rules that exist within the database.
Click on the Create button on the Toolbar.
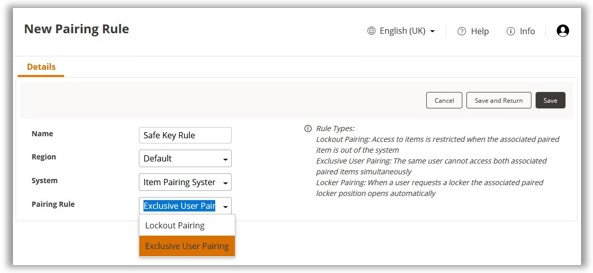
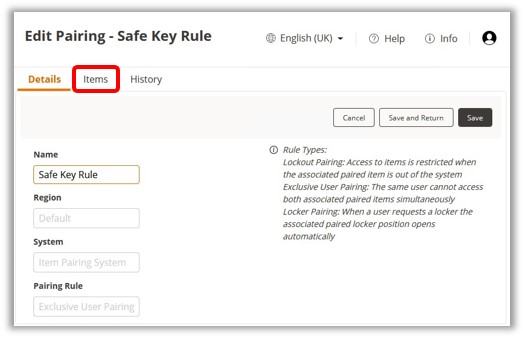
You will be taken to
a new page, where you will need to provide a name for the new rule,
and then subsequently select the Region and the System which will
be affected by the new rule, as well as select the Pairing Rule Type
that you need to create.
To decide which rule you should create, refer to the Item Pairing Overview
section in this document.
Once you have made your
selection, click on Save.
NOTE: Once you
have created the rule, you will not be able to change its selected
Region, System, or Pairing Rule Type. If that is the case, you will
need to delete the rule and create a new one instead.
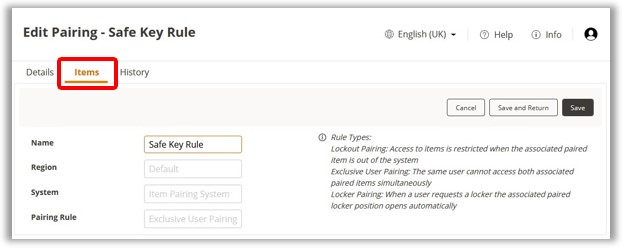
The page will now update, and your selected Region, System, and Pairing
Rule Type will be greyed out. You will also gain access to two new
tabs: Items and History.
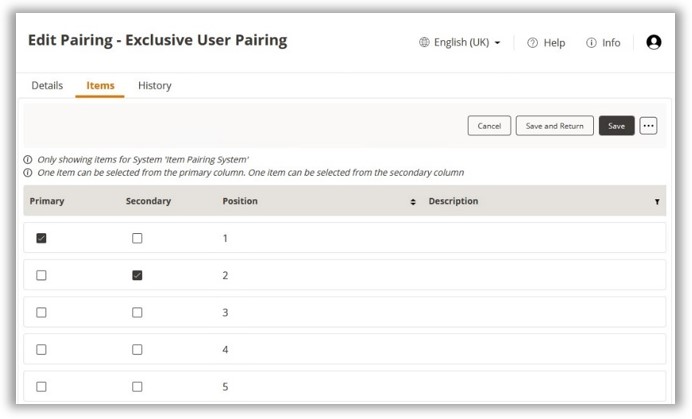
Select the Items
tab.
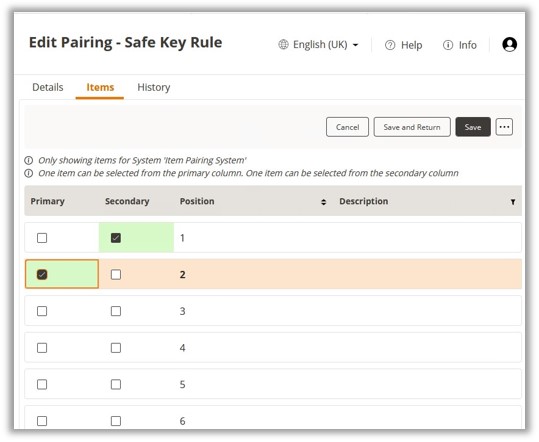
Depending on the Item
Pairing Rule you have chosen previously, select your Primary and Secondary
Items by checking the boxes in the relevant columns next to the respective
Items’ positions.
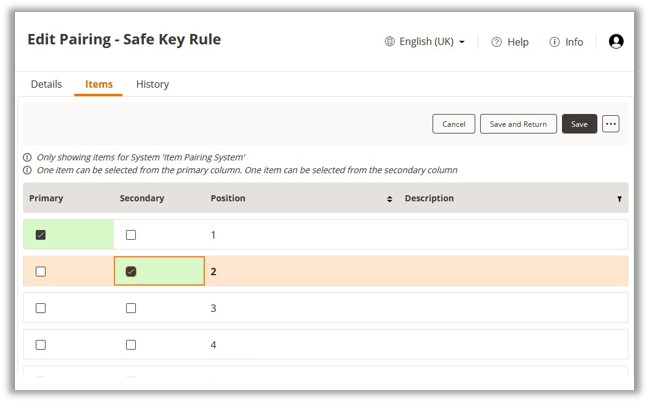
NOTE: In
the Exclusive User Pairing, you may select only one Primary and one
Secondary. In the Lockout Pairing, you may select multiple Primaries
and one Secondary.
Once you have chosen your Items for the Item Pairing Rule, you can click on Save and Return.
To edit an Item Pairing
rule, select Items on the Navigation Menu. The menu will expand
and display the Pairing option.
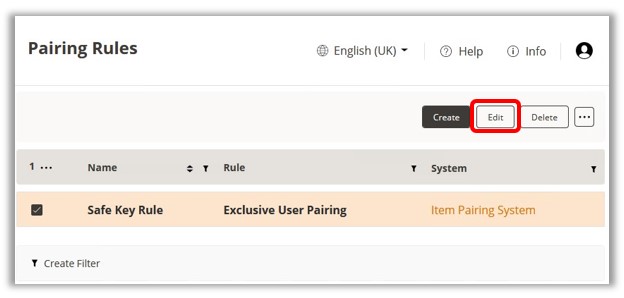
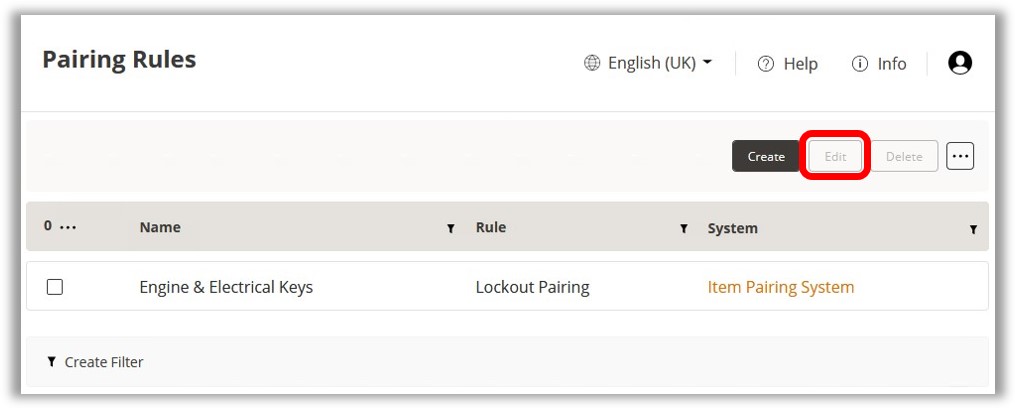
TrakaWEB will then display
all the current Item Pairing rules that exist within the database.
Select one of the existing Item Pairing rules and either click on
Edit on the Ribbon Toolbar or double-click on the selected
rule to start editing it.
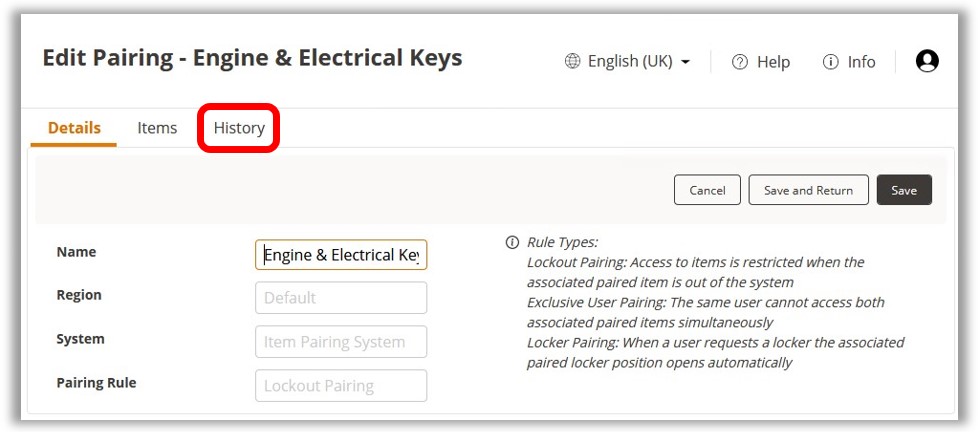
You will be redirected to the Edit Item Pairing rule Details
page. You will notice that you cannot edit any of the Region, System,
or Item Pairing Rule Type details.
NOTE: Once a rule
has been created, you will not be able to change its selected Region,
System, or Pairing Rule Type. If that is the case, you will need to
delete the rule and create a new one instead.
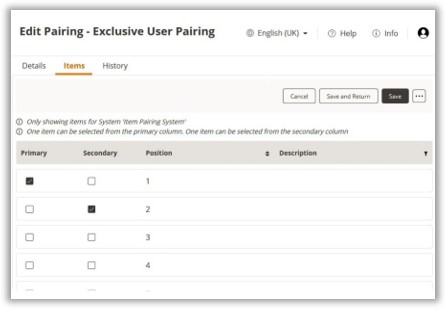
Select the Items tab.
In the Items tab, change
your selection of Primary and/or Secondary items in the Pairing Rule
as required.
NOTE: In
the Exclusive User Pairing Rule Type, you may select only one Primary
and one Secondary. In the Lockout Pairing Rule Type, you may select
multiple Primaries and one Secondary.
Click on Save and
Return.
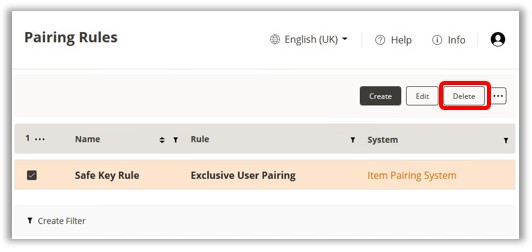
To delete an Item Pairing rule, navigate to the Pairing Rules page where all the current Item Pairing rules will be displayed.
Select one of the existing Item Pairing rules that you wish
to delete and then click on the delete button on the Ribbon Menu.
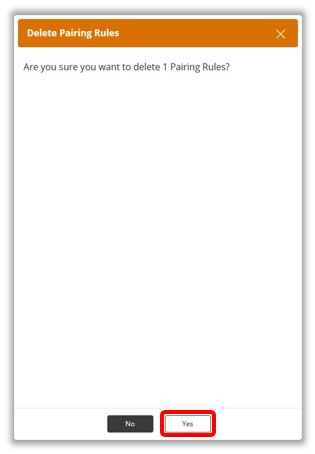
A
window will appear asking you to confirm that you wish to delete the
selected Item Pairing Rule. Select Yes to continue.
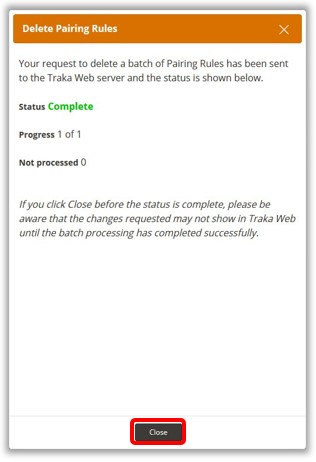
The
rule will now be deleted.
Click
on close to exit from the window.
When the Item Pairing feature is enabled on Fixed Return to Single System systems, the items associated with selected Item Pairing Rules are accessible at any time, provided that the Item Pairing Rule’s conditions have been met and the user who is trying to access the items has been authorized to remove them from the affected system(s).
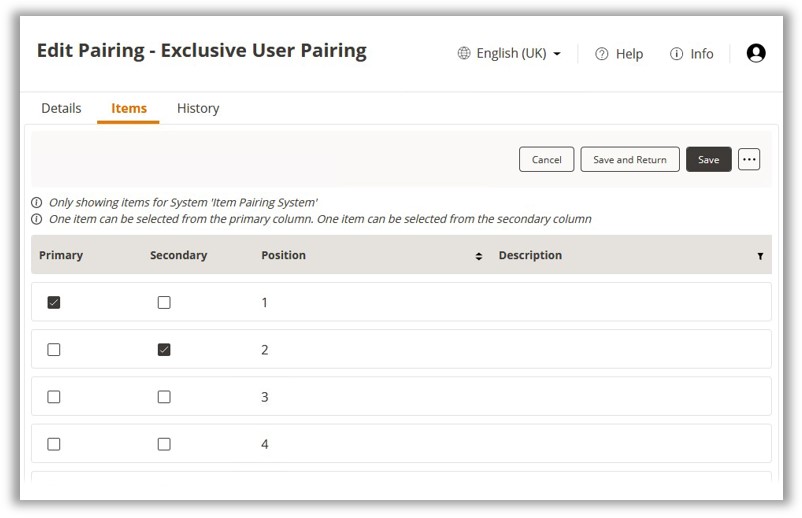
Once an Exclusive User Pairing Rule has been set in place in TrakaWEB, the feature will work on the selected system as soon as the synchronisation completes. In the example below, the following Exclusive User Pairing Rule has been created:
The item in Position 1 has been set as the Primary item, and the item in Position 2 has been set as the Secondary item.
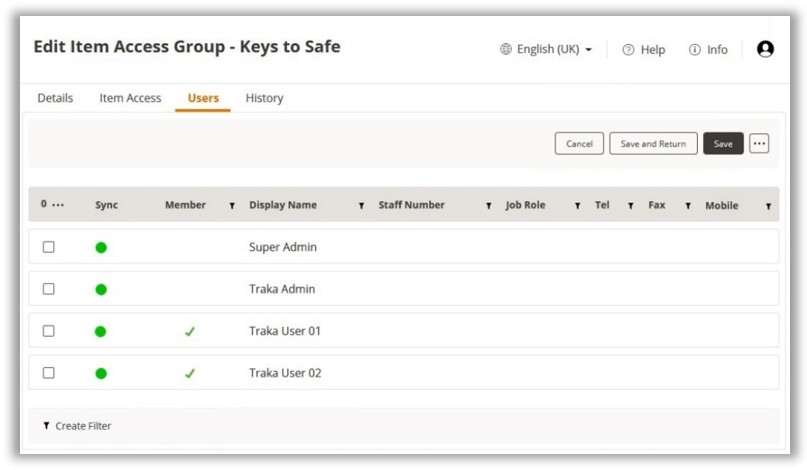
Two users are registered on the system: Traka User 01 who has access to all the items stored in the system, and Traka User 02, who has only got access to the item in Position 1.
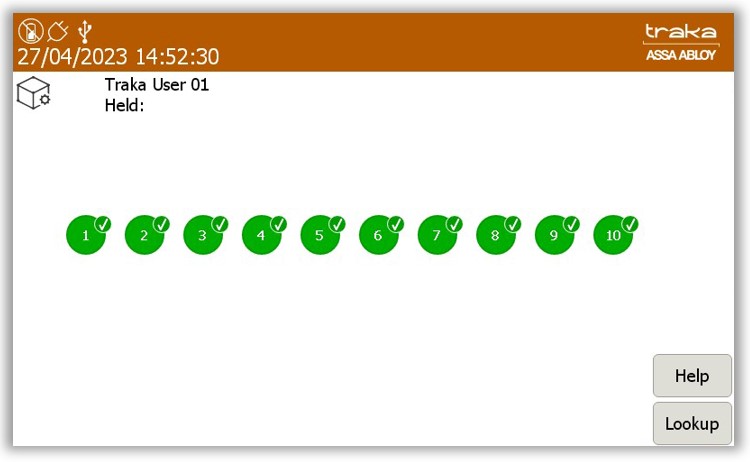
When
Traka User 01 logs into the affected Traka Touch system, they can
remove any item from it. In the example below, the item in Position
1 has been chosen.
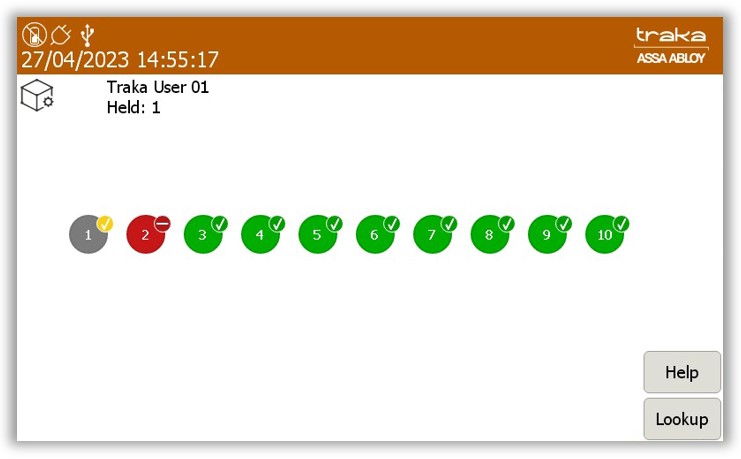
The
moment they have taken the item from Position 1, which is the Primary
item in the existing Item Pairing rule, the item in Position 2, which
is the Secondary Item, will automatically become unavailable to that
user.
Traka
User 01 logs in again to return the Primary Item to Position 1. Now,
the Item in Position 2 becomes available to the user again.

If
the Traka User 01 now removes the item from Position 2, the item in
Position 1 will automatically become unavailable.
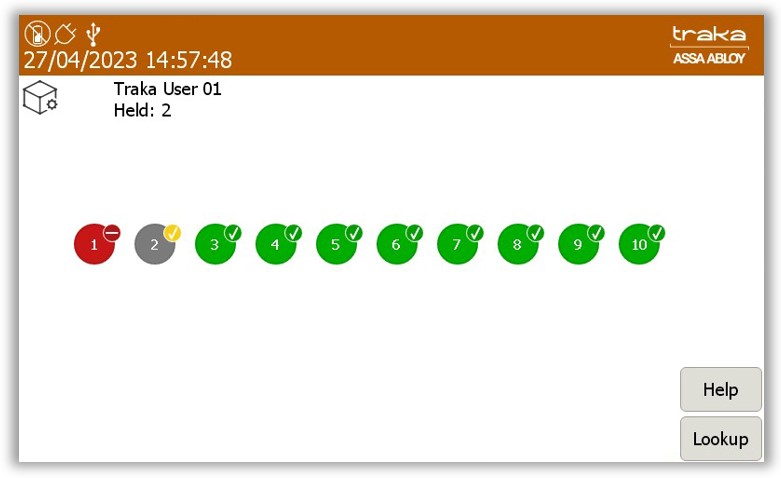
NOTE: This feature
will prevent one user from removing both paired items from the system
at any given moment and the user will need to return one item to remove
the other.
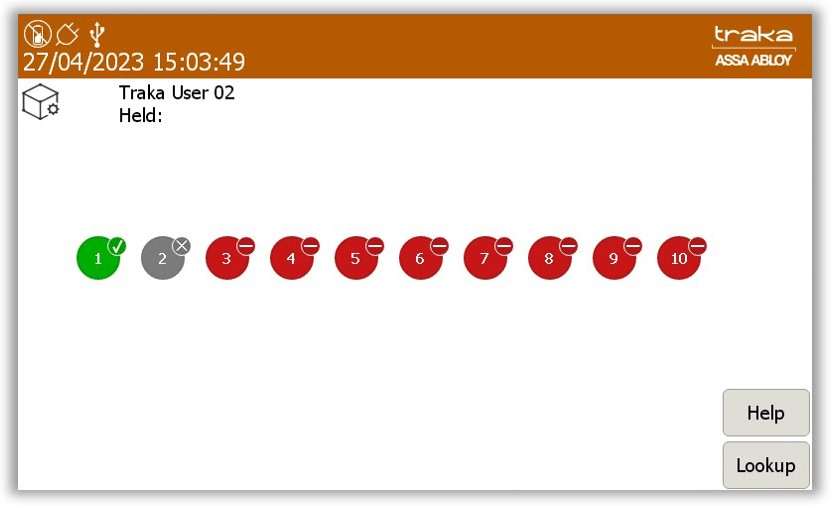
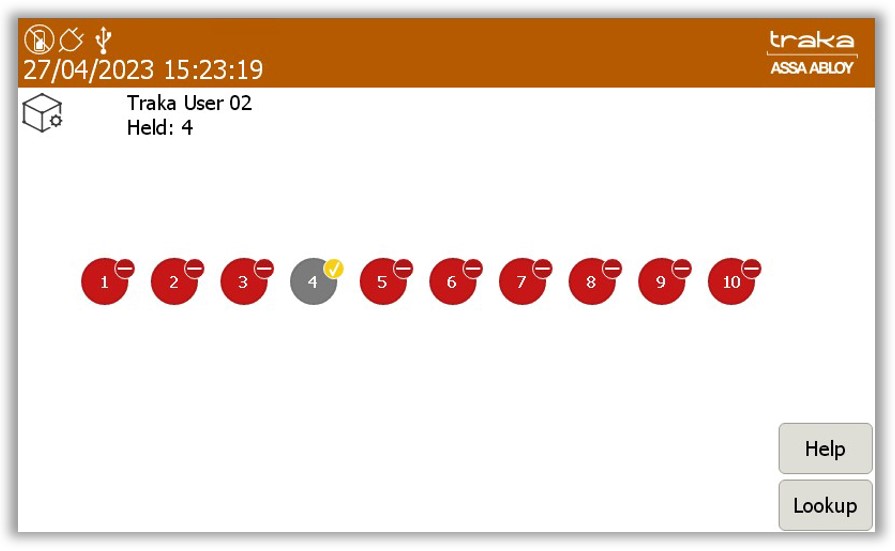
If
the Traka User 02 logs in at that time, they will be able to remove
the item from Position 1 (that is the only Item they are authorized
to remove).
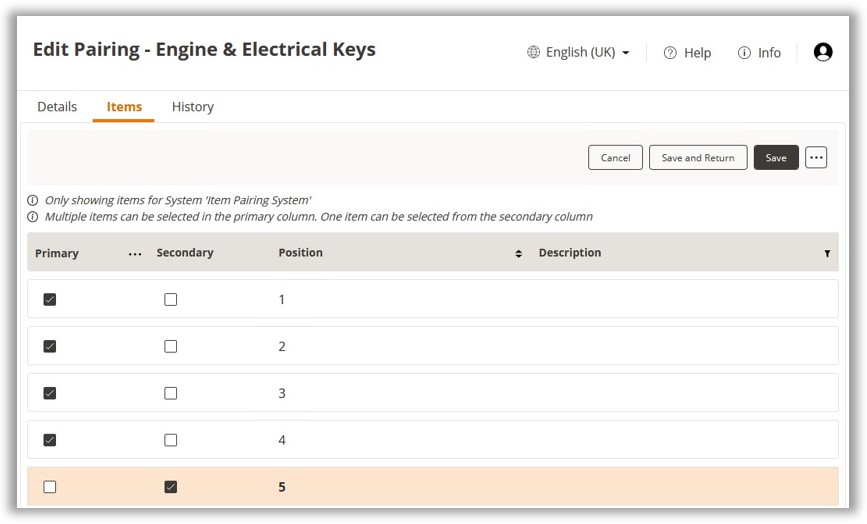
Once a Lockout Pairing Rule has been set in place in TrakaWEB, the feature will work on the selected system as soon as the synchronization completes. In the example below, the following Lockout Pairing Rule has been created:
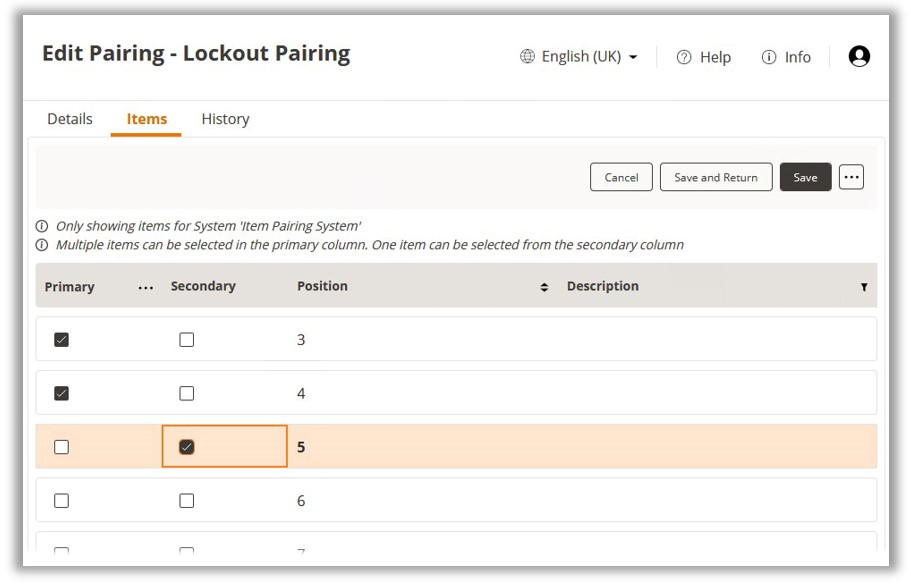
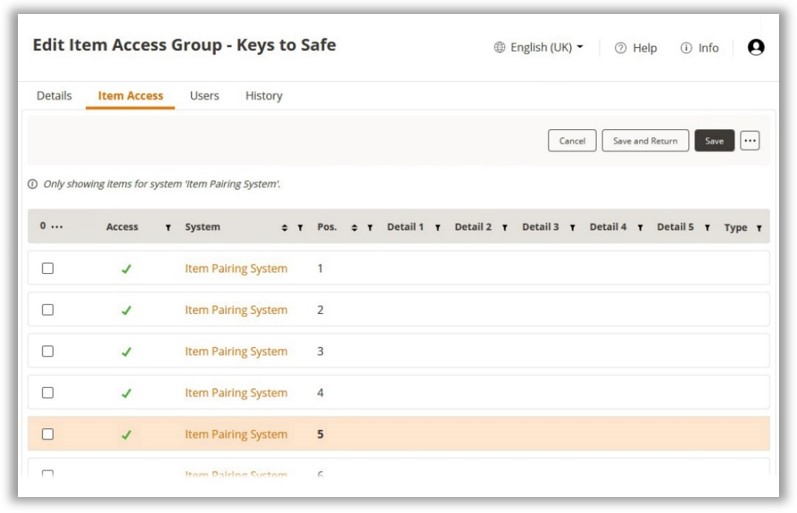
The items in Positions 3 and 4 have been set as the Primary items, and the item in Position 5 has been set as the Secondary item.
Two users are registered on the system: Traka User 01 who has access to all the items stored in the system, and Traka User 02 who has only got access to the items in Positions 4 and 5.
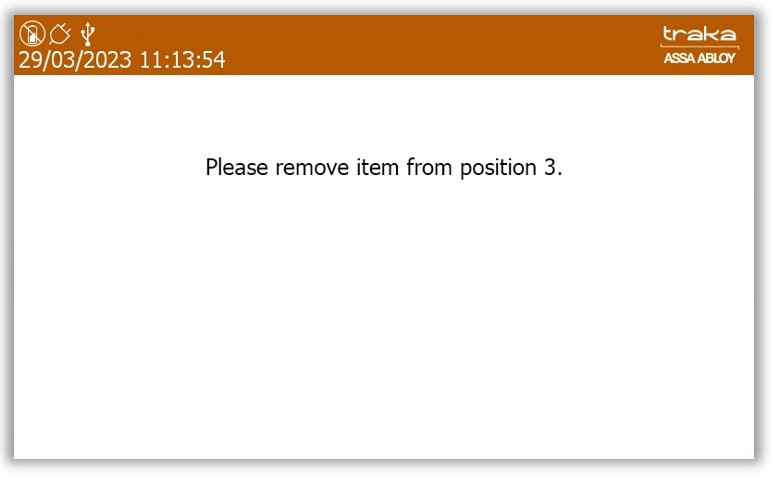
When Traka User 01 logs
into the affected Traka Touch system, they can remove any item from
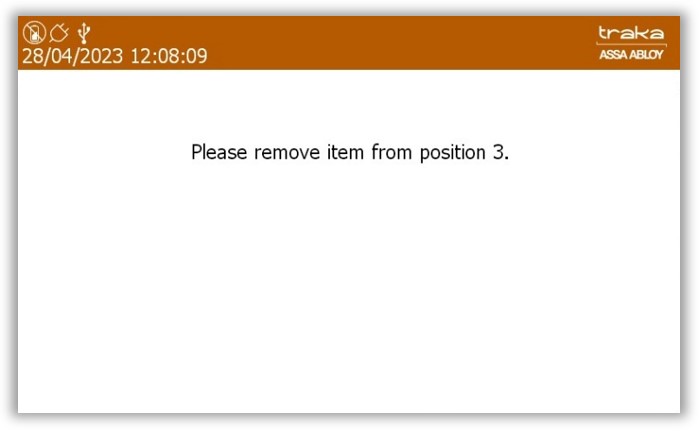
it. They choose to remove the item in Position 3.
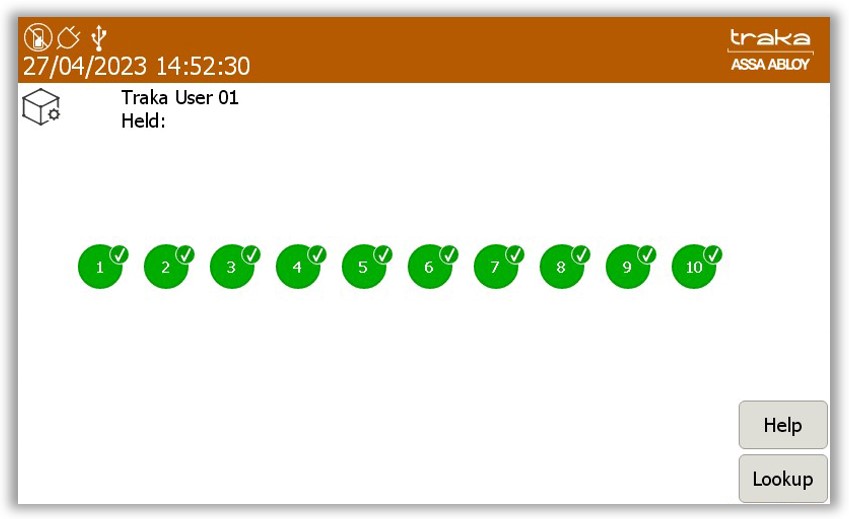
Once the item has been
taken from Position 3, which is one of the Primary items in the Item
Pairing rule, the item in Position 5, which is the Secondary item,
will automatically become unavailable, but the other Primary item
in Position 4 is still available.

NOTE: As long
as any Primary items are out of the system, the Secondary item will be
unavailable, regardless of who is trying to access it.
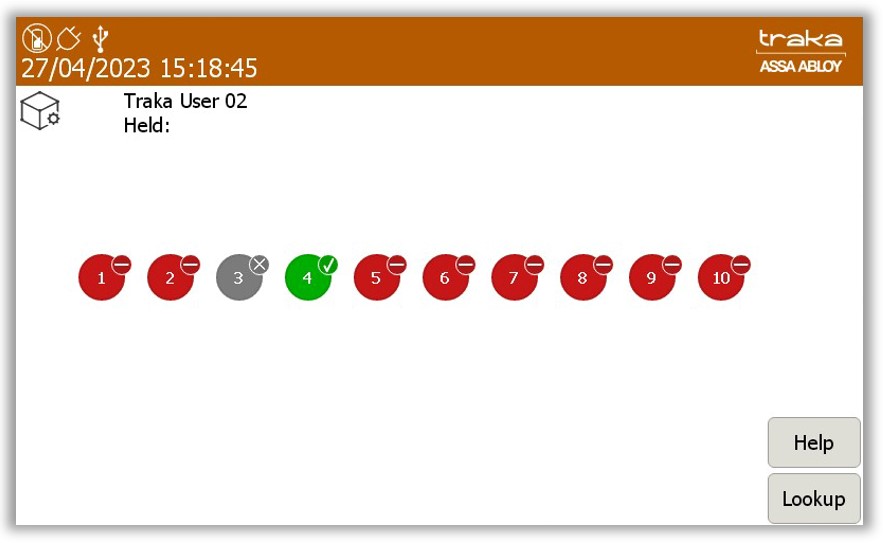
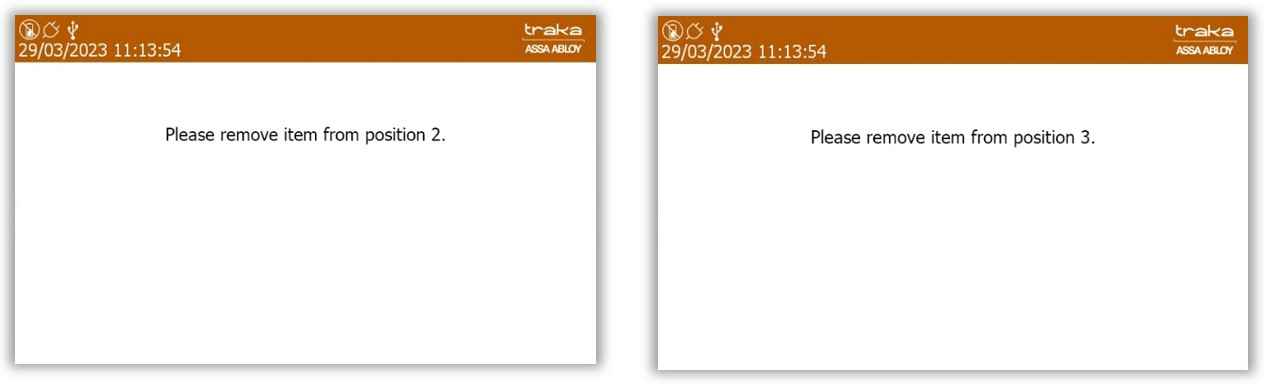
Traka User 02 removes the other Primary item from Position 4.
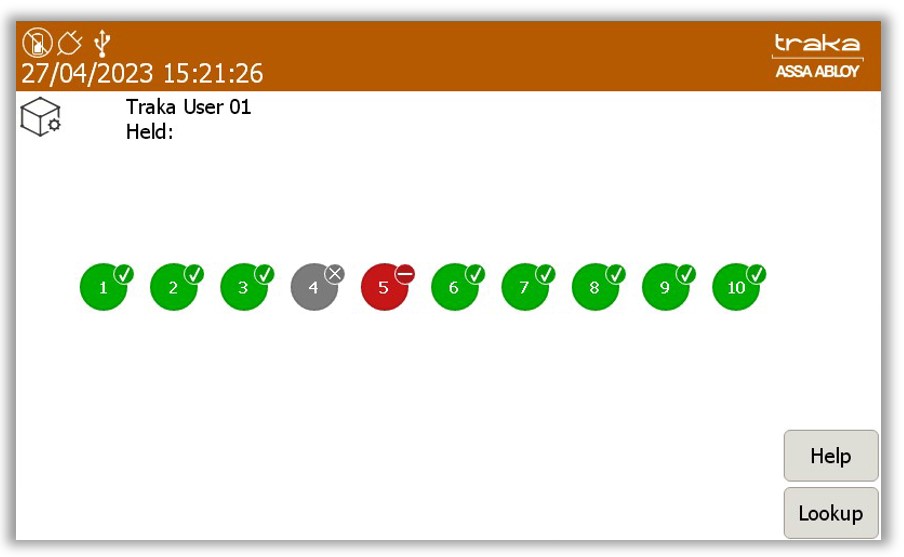
When Traka User 01 logs in again and they return the item to
Position 3, they will see that the Secondary item in Position 5 is
still unavailable as the item in Position 4 is now out of the system.
Traka User 01 logs out.
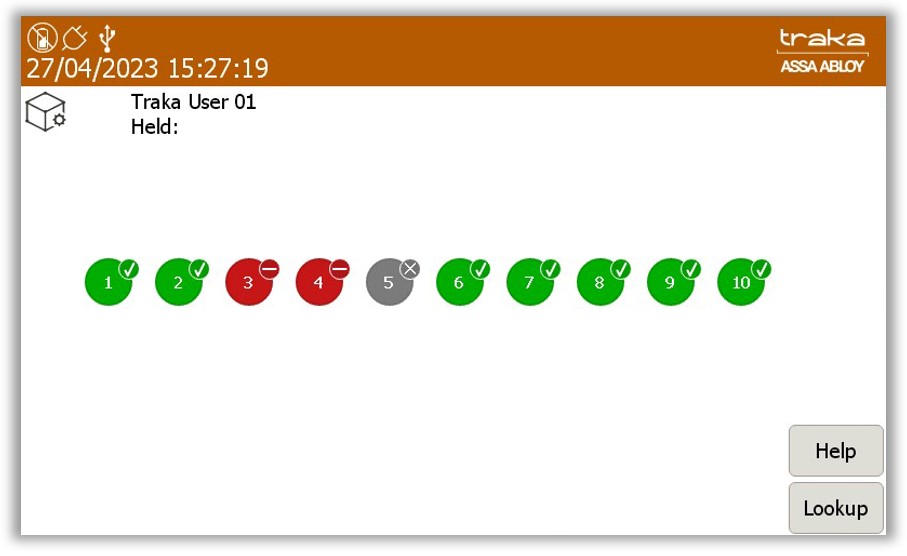
Traka User 02 logs in
afterwards and returns the last Primary item to the system. They are
now able to remove the Secondary item from Position 5. Traka User
02 removes that item.
NOTE: As long as the Secondary item is out of the system, no user can remove any of the Primary items.
When Traka User 01 logs
into the system, they are not able to remove any of the Primary items
as the Secondary item is still out of the system.
When the Item Pairing feature is enabled on Advanced FIFO systems, the items associated with selected Item Pairing Rules will follow the same rules which are in place for the Fixed Return to Single System systems, but they will also be accessible to the system users on a First In-First Out basis, provided that the Item Pairing Rule conditions have been met and the user who is trying to access items has been authorized to remove them from the affected system(s). To read more on the Advanced First In-First Out feature, please refer to UD0232 – TrakaWEB FIFO and Advanced FIFO User Guide.
Once an Exclusive User Pairing Rule has been set in place in TrakaWEB, the feature will work on the selected system as soon as the synchronisation completes. In the example below, the following Exclusive User Pairing Rule has been created:
The item in Position 1 has been set as the Primary item, and the item in Position 2 has been set as the Secondary item.
Two users are registered on the system: Traka User 01 and Traka User 02.
One Common Item Access Group (CIAG) has been set up for the affected system and the Item Allowance within that CIAG has been set to 3.
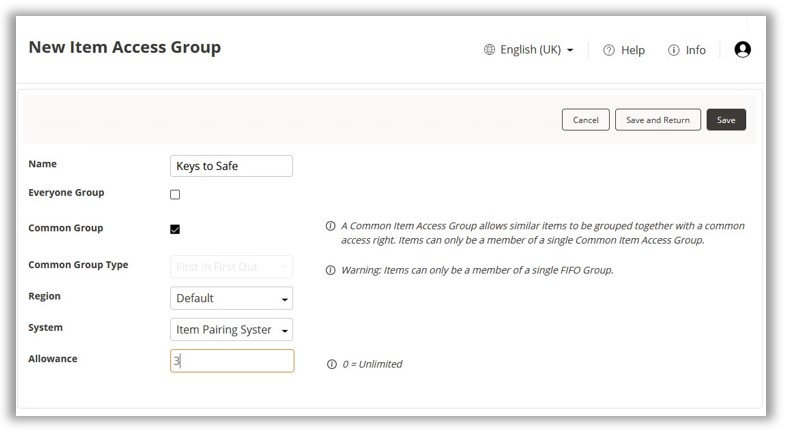
All 5 items from the affected system have been assigned to that Common Item Access Group.
Both Traka User 01 and Traka User 02 have been made members of that CIAG.
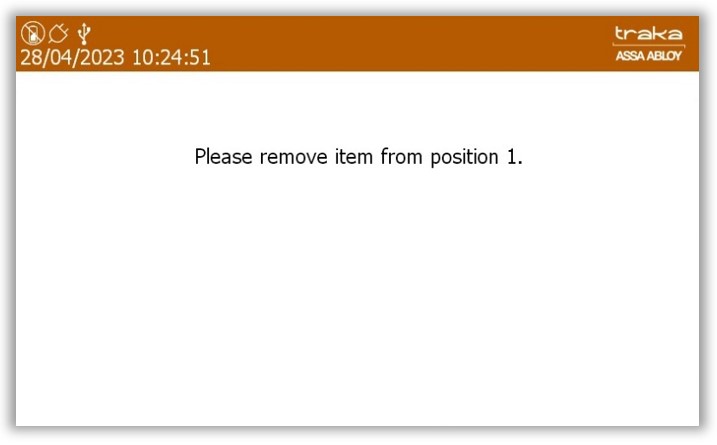
1. When
Traka User 01 logs into the affected Traka Touch system, the system will
automatically release the Item that has been in the system for the longest
time. In this case, it is the item stored in Position 1.
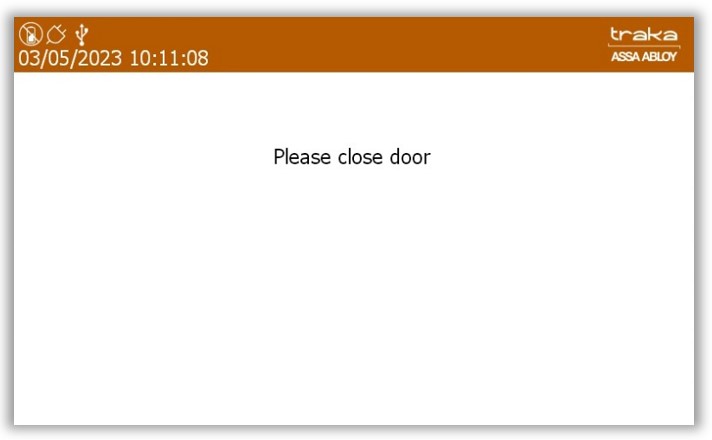
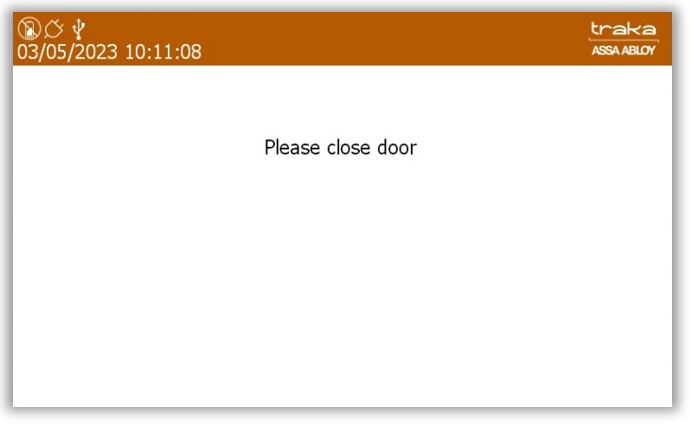
After the user has removed
the item, they will be asked to close the door to the system.
Since the Item Allowance
within this group is 3, when the user logs back into the system, they
will have the option to take another item. They will also have the
option to return any items in their possession.
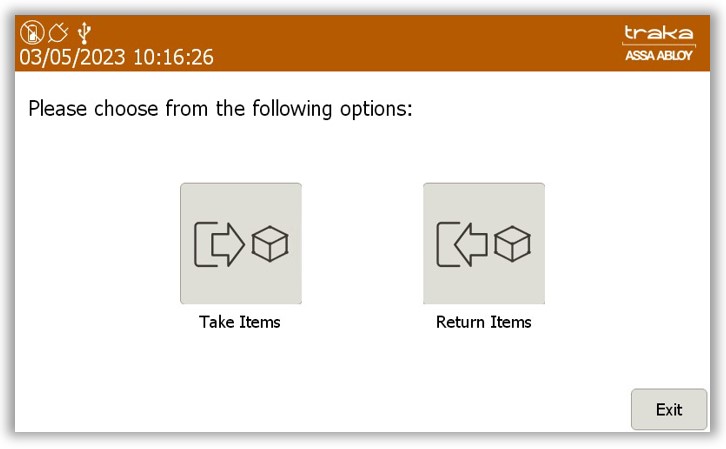
Traka User 01 selects
the Take Items button. This automatically releases the next
item within that CIAG which has been in the system for the longest
time, with the exception of the item in Position 2. The item in Position
2 is the Secondary item in the User Exclusive Pairing and, since Traka
User 01 has already taken the Primary item from the pair, they will
not be able to remove the item from Position 2, even if the item in
Position 2 has been in the system for the longest amongst all the
remaining items in that system. Traka User 01 will receive the next
one in the queue instead.
After taking the item from Position 3, the system will once again ask the user to close the door.
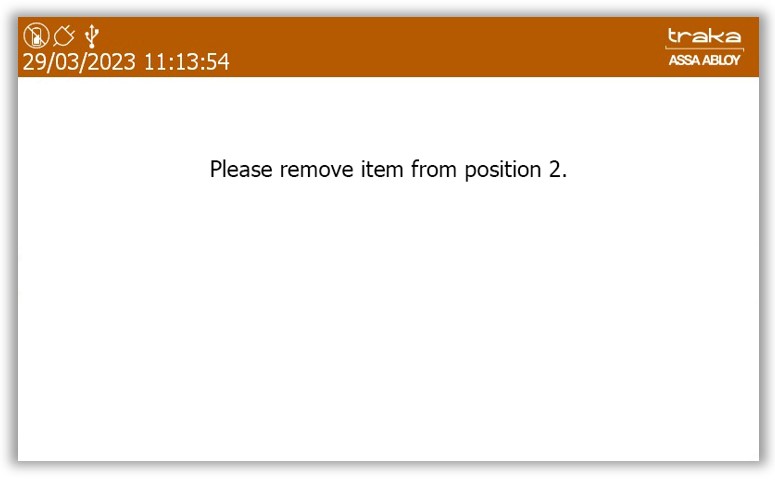
When Traka User 02 logs
in, the system will automatically release the item in Position 2 to
them, as this is the item that has been in the system for the longest
and this user does not have the Primary item from the pair that item
in Position 2 belongs to.
All the other functionalities typical of the Advanced FIFO feature
will apply as normal.
Once an Exclusive User Pairing Rule has been set in place in TrakaWEB, the feature will work on the selected system as soon as the synchronisation completes. In the example below, the following Exclusive User Pairing Rule has been created:
The item in Position 1 has been set as the Primary item, and the item in Position 2 has been set as the Secondary item.
Two users are registered on the system: Traka User 01 and Traka User 02.
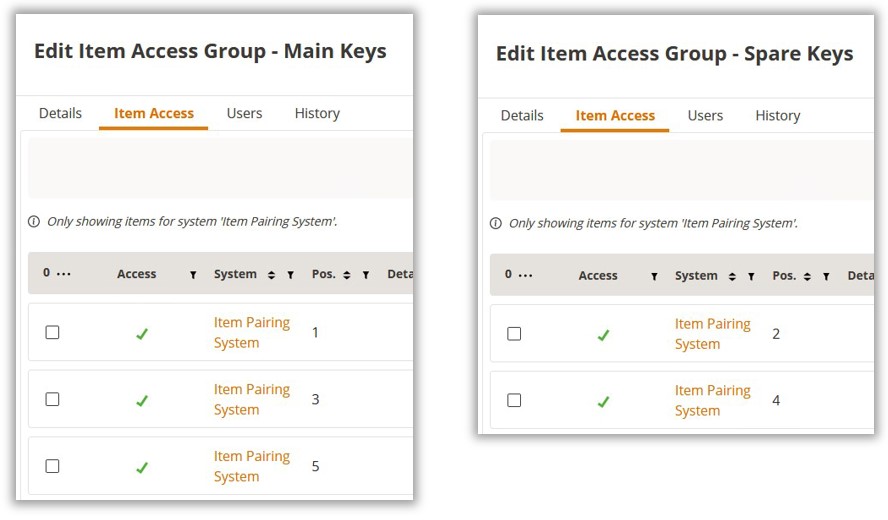
Two Common Item Access Groups (CIAGs) have been set up for the affected system and the Item Allowance within each CIAG has been set to 2:
Main Keys group which comprises items in Positions 1, 3, and 5
Spare Keys group which comprises items in Positions 2 and 4.
Both Traka User 01 and Traka User 02 have been assigned to both CIAGs.
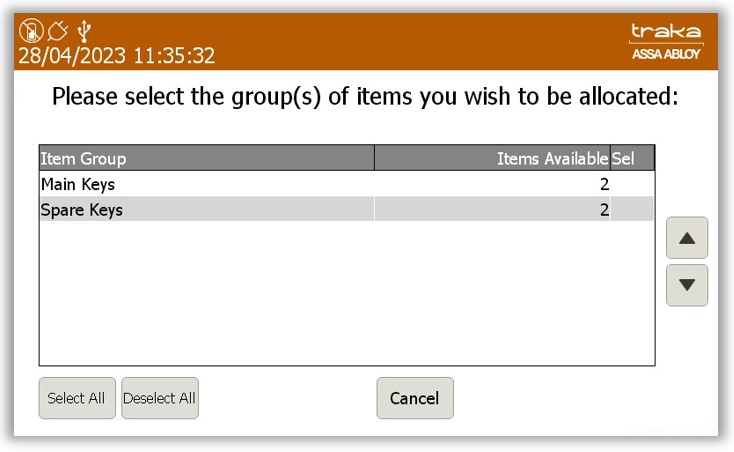
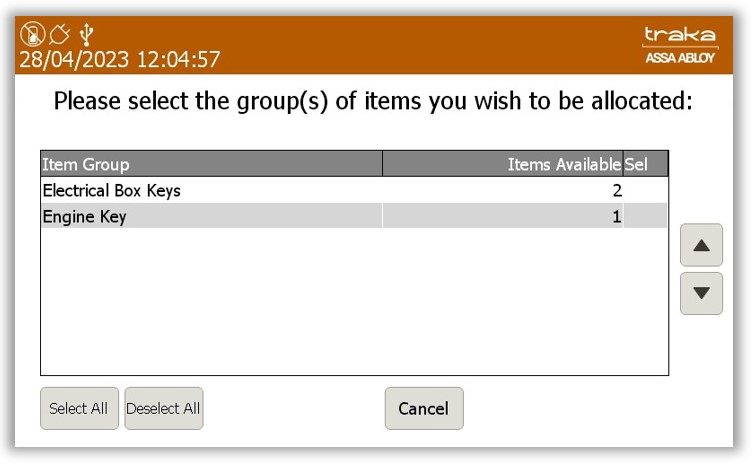
When Traka User 01 logs into
the affected Traka Touch system, the system will ask which CIAGs the
user needs to remove items from.
Traka User 01 chooses to remove
items from both groups, selects them on the screen and clicks on Continue.
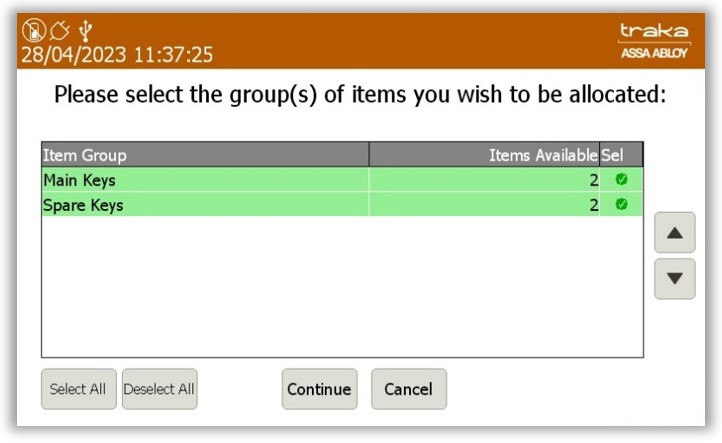
The system releases one item from the Main Keys group that has
been in the system for the longest time and one item from the Spare
Keys group that has been in the system for the longest time. In the
example below, the system releases the items from Positions 1 and
4.
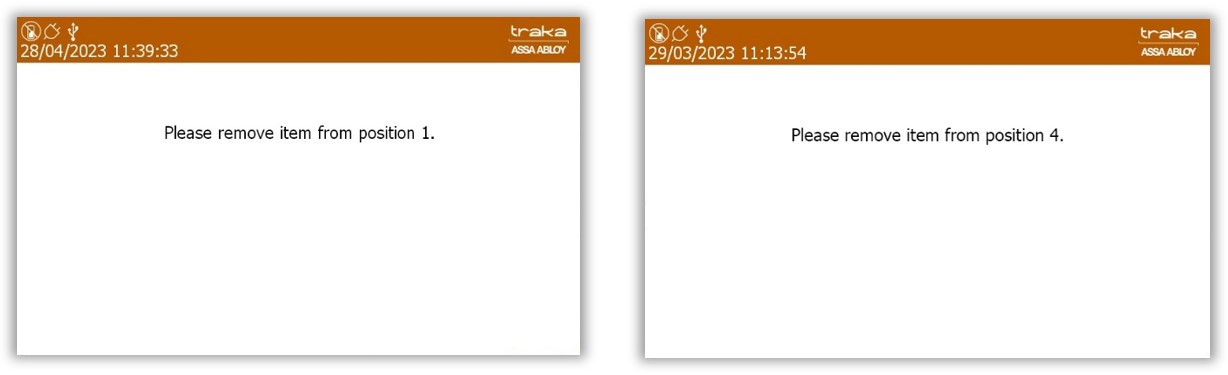
NOTE: As
Traka User 01 has removed the item in Position 1 which is the Primary
item in the Exclusive User Pairing Rule, the system will automatically
ignore the item in Position 2 when handing out items from the second
CIAG, as in accordance with the Item Pairing rule one user cannot
hold both the Primary and Secondary items simultaneously.
When Traka User 02 logs
in and removes items from both CIAGs, the system will again release
one item from each group automatically. This time, the system will
release the item in Position 2 as Traka User 02 does not hold the
item from Position 1 on them.
NOTE: With the Lockout Pairing Rule in place, we highly recommend assigning the Primary items into one or more CIAGs, and the Secondary Item to a separate CIAG. Although it is entirely possible to assign both the Primary items and the Secondary item into the same group, the system will be releasing them to authorized users in accordance with the First In-First Out principles. In this case, users would not be able to tell if the item they have received was one of the Primaries or the Secondary, and, if it were indeed the Secondary item, they would unknowingly block all other users from removing any of the Primaries.
Once a Lockout Pairing Rule has been set in place in TrakaWEB, the feature will work on the selected system as soon as the synchronisation completes. In the example below, the following Lockout Pairing Rule has been set up:
The items in Positions 1 to 4 have been set as the Primary items, and the item in Position 5 has been set as the Secondary Item.
Two Common Item Groups have been set up, one which will hold all the Primaries and the other which will hold the Secondary. Both have an allowance of 2.
NOTE: You can divide your Primary items between multiple Common Item Access Groups as required. In the example below, all Primary items are shown as belonging to one CIAG only for simplicity. Similarly, more than one item may belong to the group containing the Secondary item. We only recommend not assigning both the Primaries and the Secondary items into the same group.
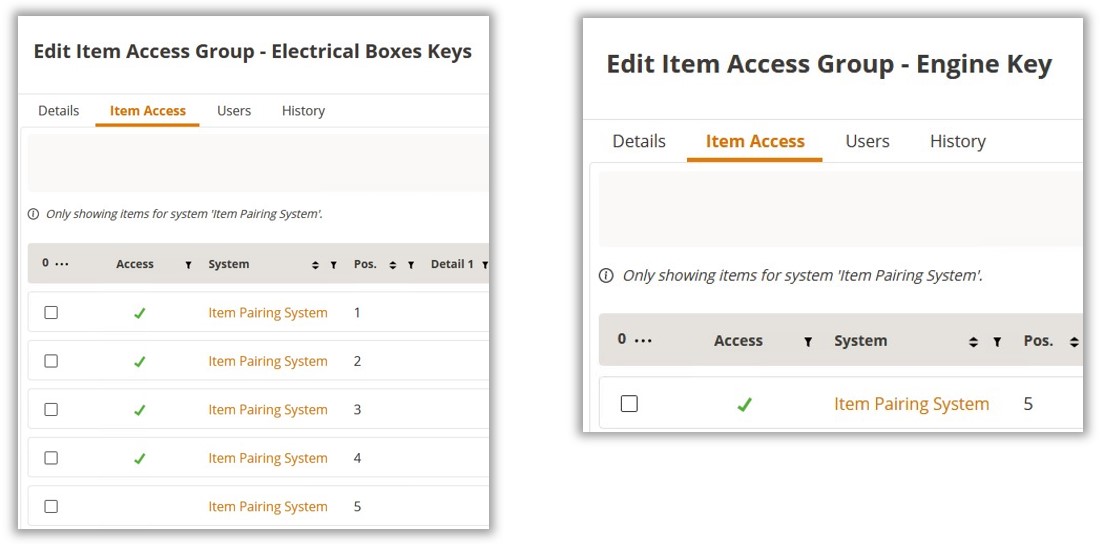
Two users have been registered on the system: Traka User 01 and Traka User 02. Both have been assigned to both CIAGs.
When Traka User 01 logs
into the affected Traka Touch system, the system will ask which CIAGs
the user needs to remove items from.
Traka User 01 selects
the Electrical Boxes Keys (the CIAG with Primaries) and the system
releases one key from that group to them. The system releases items
from that group following the First In-First Out principles. In the
example below, the item in Position 3 has been in the system the longest
and this item will be released.
NOTE: Since
Traka User 01 removed one of the Primary items, the access to the
Secondary item will be automatically blocked to them and any other
user.
After removing the item
from position 3, the user will be asked to close the door.
Since the Item Allowance
within this group is 2, when the user logs back into the system, they
will have the option to take another item. They will also have the
option to return any items in their possession.

5. If the user selects the Take Items button, provided that the item allowance for the CIAG permits it, another primary item that has been in the system the longest, will be released to the user.
Traka User 01 closes the door and is logged out.
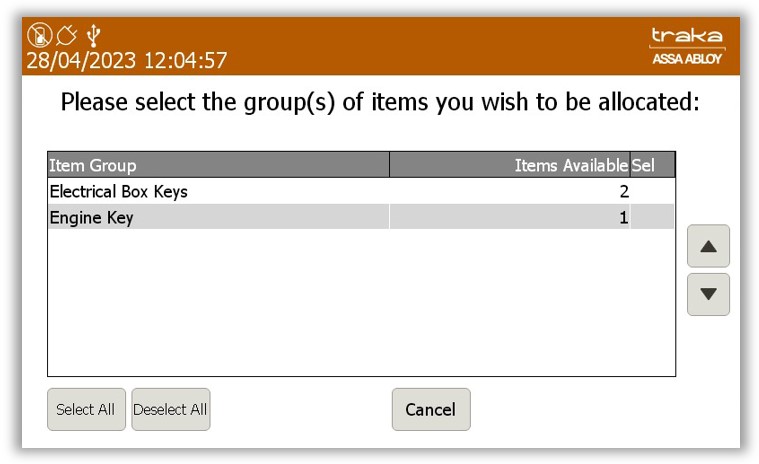
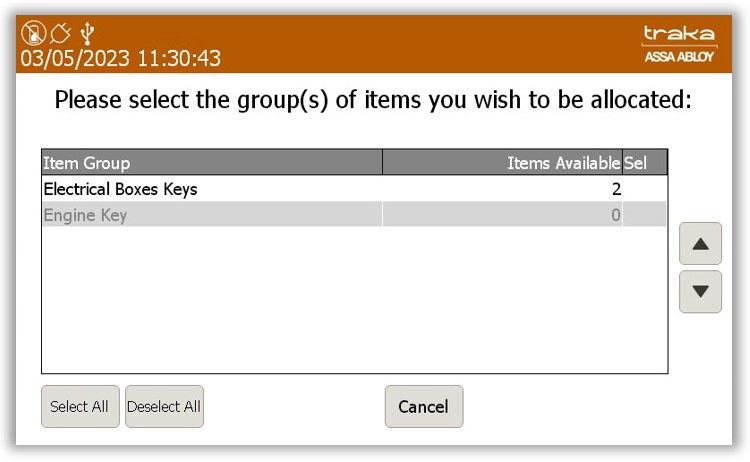
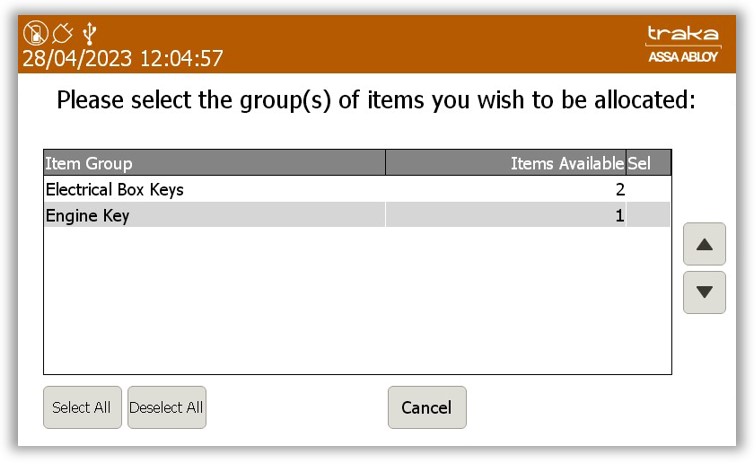
When Traka User 02 logs
into the system, they are taken to the CIAG selection screen and will
also see the Engine Key group unavailable. This is because one of
the Primary items is still out of the system. Traka User 02 can only
select to remove items from the Electrical Boxes Keys group. If they
select that group, the system will release one item from that group
in accordance with the First In-First Out principle.
Traka User 02 does not remove any items and logs out.
Next, Traka User 01 logs in and returns one of the Primary items they have held.
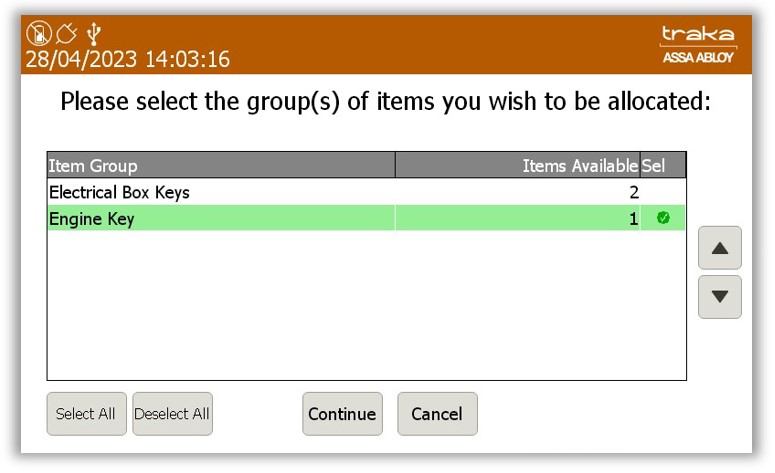
Then Traka User 02 logs in again and they are taken to the CIAG
selection screen.
Since all the Primary items from the Electrical Boxes Keys group
are now back in the system, Traka User 02 is allowed to remove an
item from the Engine Key group.
Since the item in the Engine Key group is the Secondary item, its removal blocks all the Primary items in the system. No user is now allowed to remove them until the Secondary item has been returned. Since the Electrical Boxes Keys CIAG consists only of the Primary items, all of them become automatically unavailable. Traka User 02 is automatically logged out.
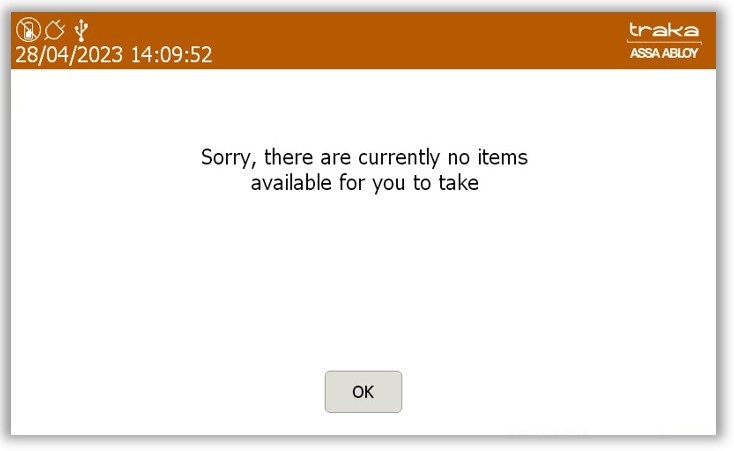
If Traka User 01 tries to log in then, a message will appear
on screen informing them that they have been recognized but there
are no items available for them to take.
Once the Secondary item
from the Engine Key CIAG has been returned by Traka User 02, the users
regain access to the affected CIAGs.
NOTE: If
a user chooses to remove items from more than one CIAG, and one of the
selected CIAGs contains Primary items and another one contains the Secondary
item, then the system will release the item with the smallest Position
number first, regardless of which group that item belongs to, following
the First In-First Out principle.

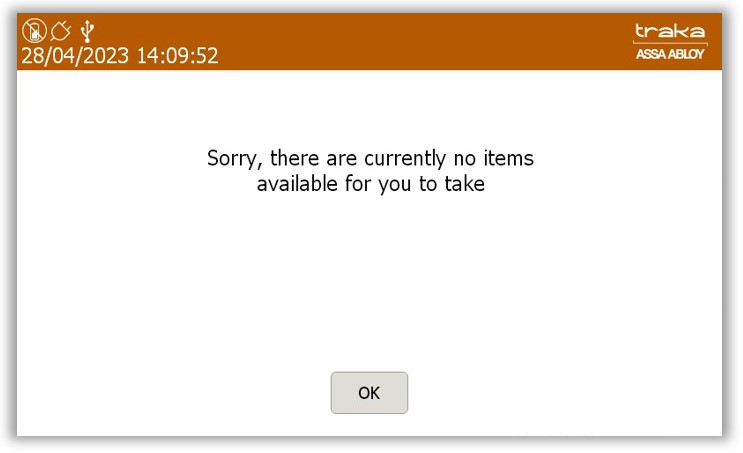
Once the first item has been removed, the
system will check if the item has been associated with any Item Pairing
Rules. If it was a Primary item, the system will then be unable to release
the Secondary item. If it is the Secondary item, the system will be unable
to release any of the Primary items. It will then show the following message.
Since the Item Pairing is a security feature, for the safety of users and property there is no option available to grant users permissions to override the Item Pairing.
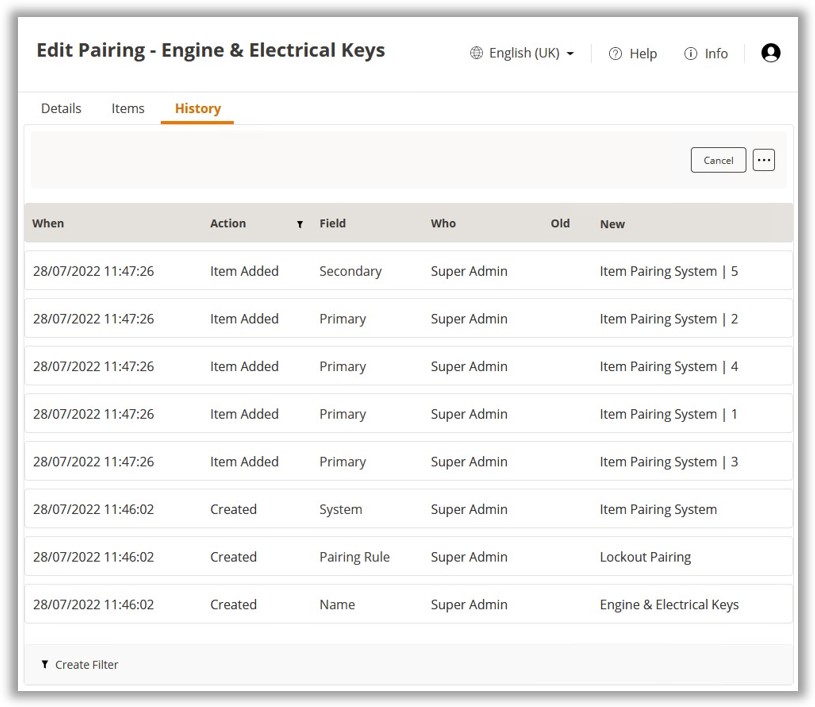
For the purposes of audit, all the changes in the Item Pairing Rules are recorded in the History tab for each Item Pairing rule.
TrakaWEB will then display
all the current Item Pairing rules that exist within the database.
Select one of the existing Item Pairing rules and either click on
Edit on the Ribbon menu or double-click on the selected rule
to start editing it.
You will be redirected to the Edit Pairing Details page.
Select the History tab.
You will then see the recorded history of all the changes to that Item
Pairing Rule.
All the events related specifically to the Item Pairing Rules will be
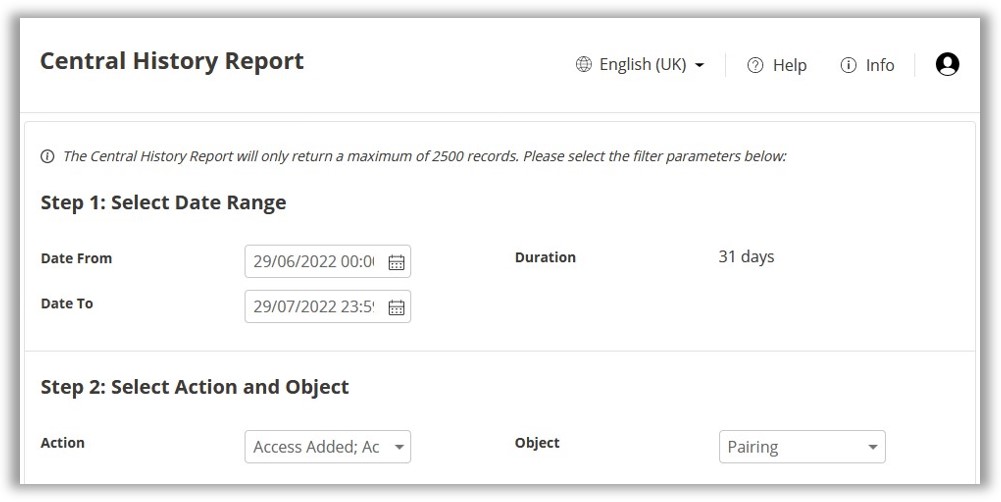
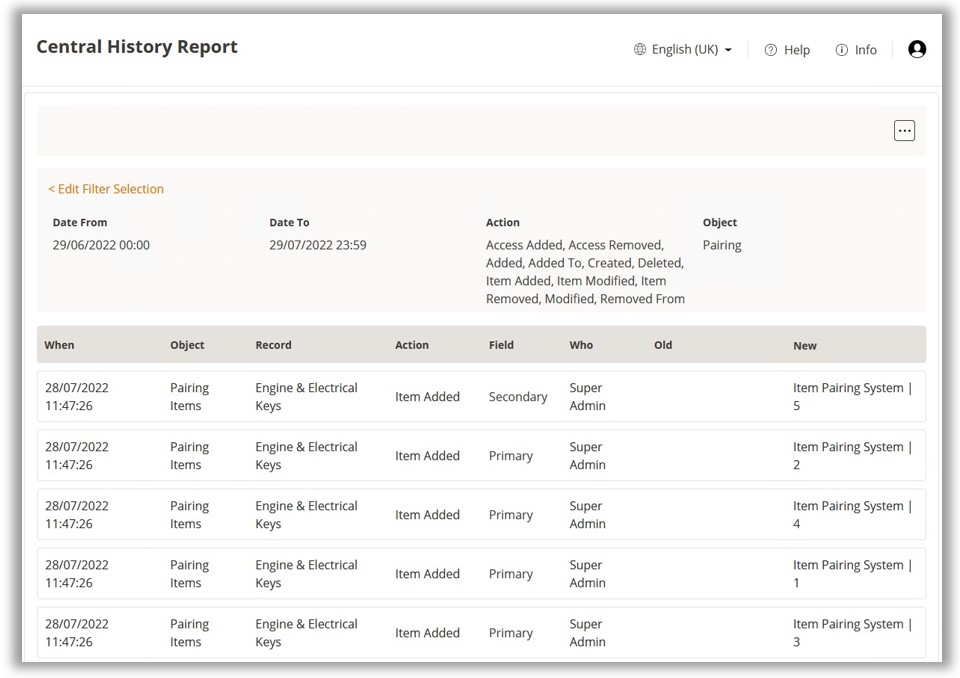
visible in the Central History Report. You can also create a Central History
Report and specifically choose Pairing as the Object for the report.
To read more on how to generate such a report, please refer to the General
Reports section in this guide.